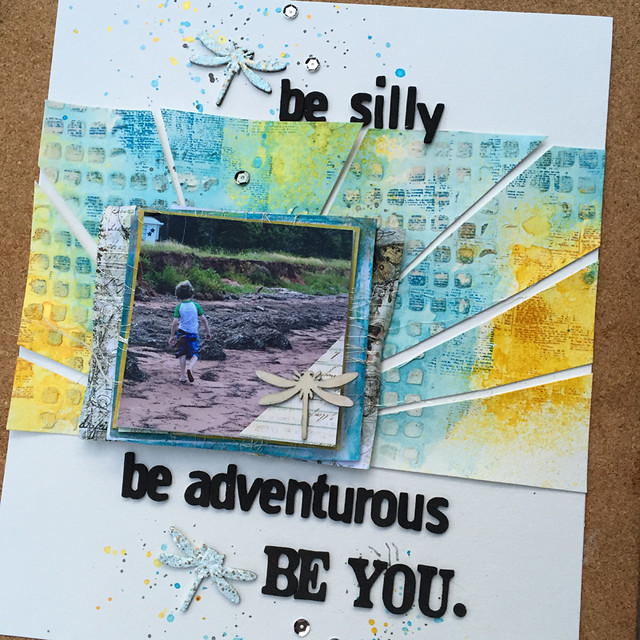
This week, my oldest son turned 9. I was inspired by his birthday to make a page for him. He's growing so fast and there are some things I want him to always remember. My color choice was inspired by Prima's PPP challenge for August. There is no such thing as too much blue in my world so I knew I had to participate.
Here are the supplies I used to make this layout.
3D Matte Gel (Prima)
Heavy Gesso (Prima)
Texture Powder (Prima)
Pattern Paper - Salvage District, Bella Rouge, Royal Menangerie, Archivist and Epiphany Collections (Prima)
Grungy Grid Stencil - Finnabair (Prima)
Prima Color Bloom 2 - Fairy Pond, Dragonfly Blue and Spring Dandelion (Prima)
Background Stamp - Book (Prima Item #960964)
Archival Ink - Orange Blossom and Manganese Blue (Ranger)
Versamark Ink (Tsukineko, Inc.)
Embossing Enamel - Shabby Blue (Stampendous)
Thickers (American Crafts)
White Gold Thread (Guterman)
Watercolor Paper (Canson)
Dragonfly Wood Veneer (Prima)
Palette Knife
Old Paint Brush
Sequins
Instructions:
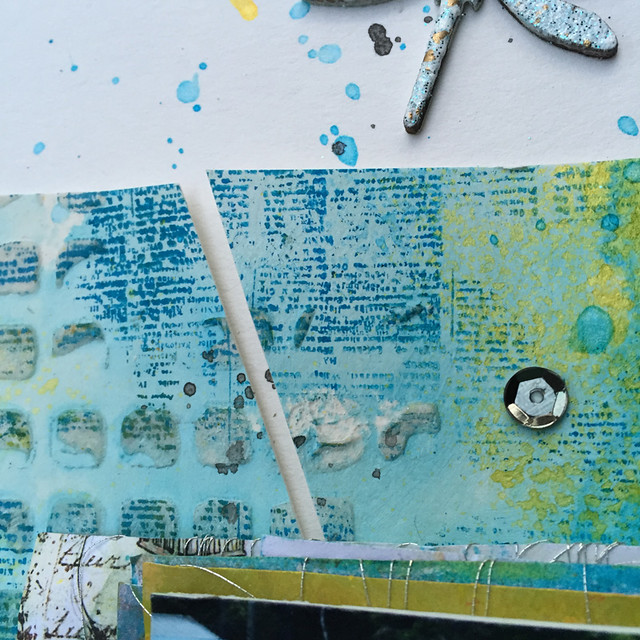
1. Mix 3D Matte Gel with Texture Powder. Scoop some 3D Matte Gel and some Texture Powder on your craft mat and mix together with a palette knife. The more Texture Powder you use the grittier and more textural your paste will be. I shared how I make my paste in last week's Mixed Media Monday post.
2. Spread on watercolor paper through stencil with palette knife. I placed my stencil randomly on my background and spread a thin coat of the paste through my stencil. Then I set it aside to dry. You can use a heat gun to dry it but if you overheat or "cook" the 3D Matte Gel it will puff up and you will lose the effect of the Texture Powder.

3. Spread a thin coat of gesso with an old brush. I always add a coat of gesso to my background. I like how the inks work and colors stay true when I use gesso.
4. Spray ink on background. I bought some of the new Prima Color Bloom sprays this week. They arrived with just the pigment and a mixing ball in the bottle. When I got home, I added water and started spraying right away. I couldn't tell the difference from the original sprays that are shipped as liquid ink. They are gorgeous but only available for a limited time. Although I hope they decide to keep Fairy Pond (below).

5. Stamp with background stamp. I like to stamp on my multi-colored backgrounds in the Archival Inks that match my background. It adds an interesting tone-on-tone effect.
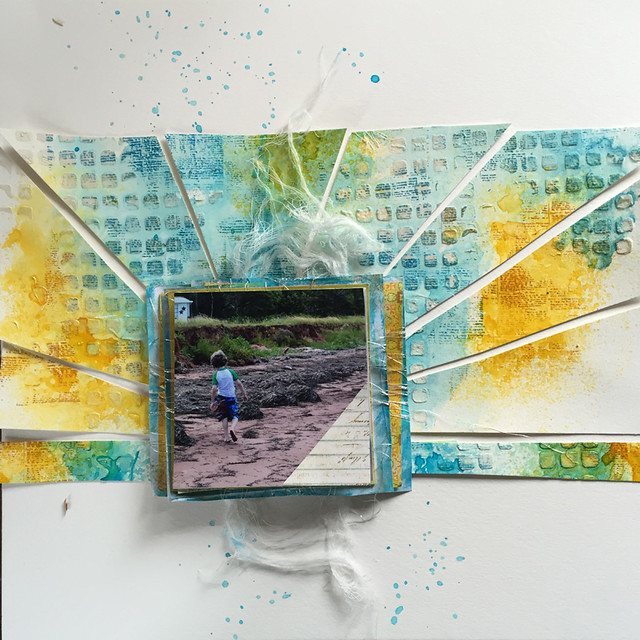
6. Create sunburst pattern. This week, I cut up my background to create a background pattern. I cut a strip from the 12x12 sheet. I flipped the paper over to the plain side and sketched out a sunburst pattern with a pencil. Then I numbered each section so I could put it back together in order on my background - a plain sheet of watercolor paper.
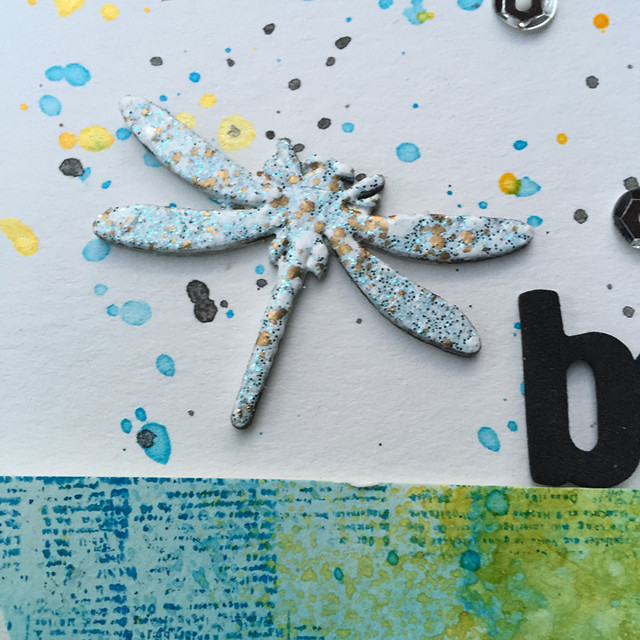
7. Embellish. To embellish this week, I added ink splatters and sequins, wound twine around the pattern paper and embossed wood veneer dragonflies.
To create the dragonflies, I pressed each one into my Versamark ink and then sprinkled on Embossing Enamel. The Versamark causes the Embossing Enamel to stick to the shape so it doesn't blow away before I can emboss it with a heat gun. I heated the embossing enamel until it melted and set aside to cool. I love how it gives such a unique effect to the dragonflies.
I also added a flip up to my layout.
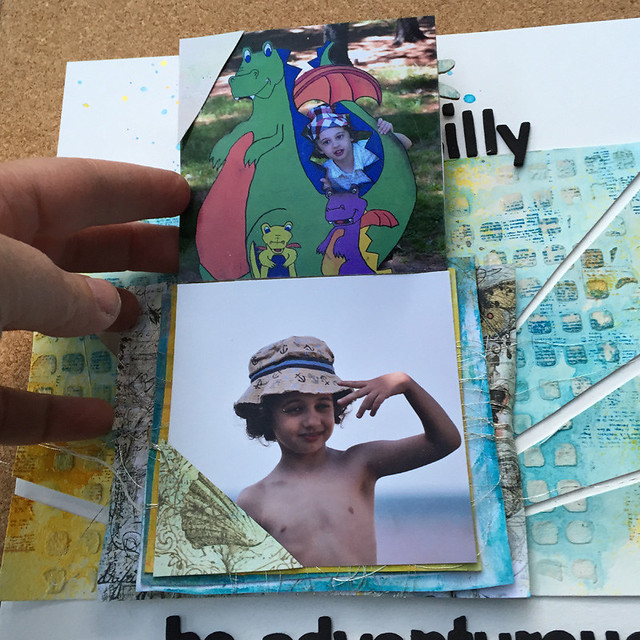
This week's layout is special to me. I wanted to remind my son about how important it is to be silly and adventurous and to always be true to himself. So, I made my journaling the title of my page. I thought that if I wrote it in journaling he might not read it. This way, he can never miss it. I like to think of it as leaving a note for him in my scrapbook.
As always, you can leave a note in the comments if you have any questions about supplies or techniques used to make today's layout.
Thanks for stopping by!
Cathie
Ohhhh I see instructions!! It's like a self paced class!! Thanks and looooooove the layout
ReplyDeleteThanks, Cathy! I'm so glad you like it. Have fun with the instructions and let me know how it turns out.
Delete