This week, I was inspired by this pack of Studio Calico Mistables.
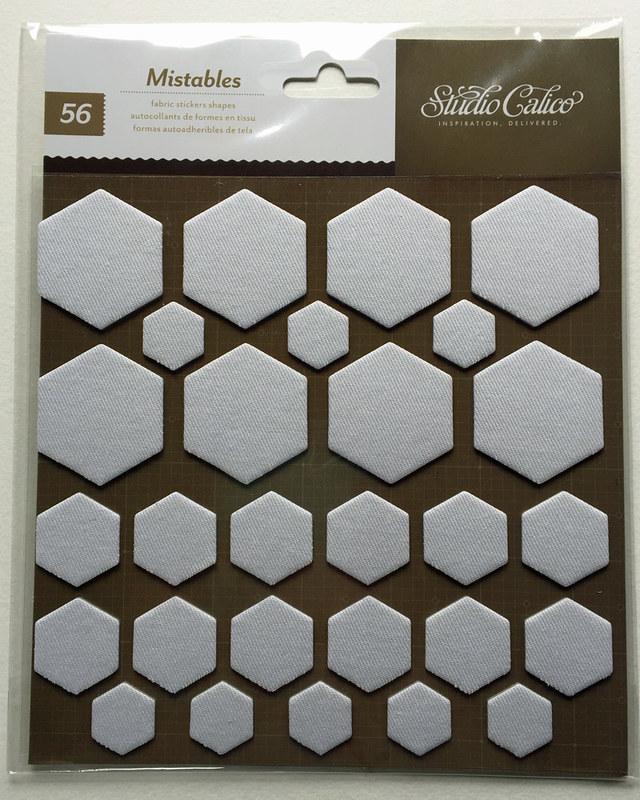
I was cleaning up my desk and found them in a pile. They are from 2012 but I still liked them so I decided to challenge myself to use them on this week's Mixed Media Monday layout.
Here's a look at at the layout.
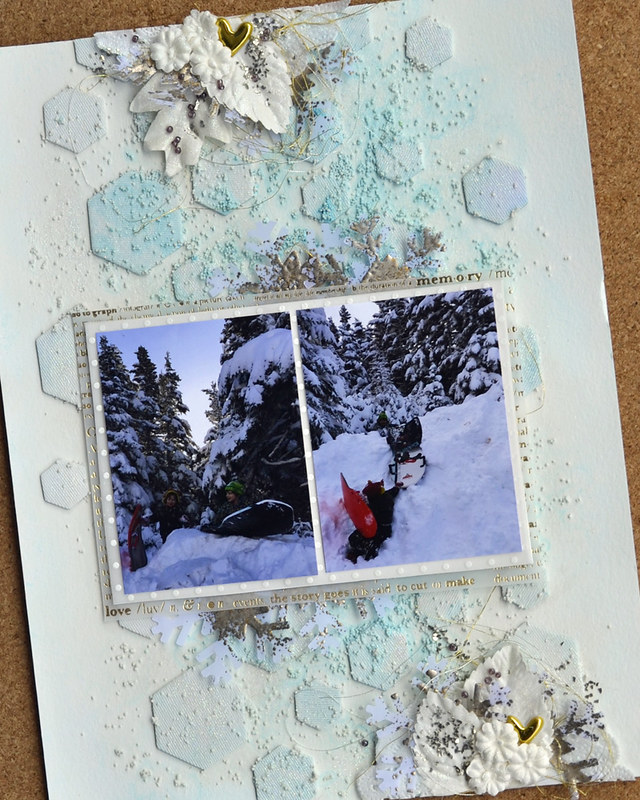
I love how this layout turned out and I'm excited to share the supplies and steps I used to make it.
Supplies:
Heavy Gesso - Art Basics (Prima)
Watercolor Paper (Canson)
3D Matte Gel - Art Basics (Prima)
Soft Gloss Gel - Art Basics (Prima)
Color Bloom 2 Spray Ink - Fairy Pond (Prima)
Mini Art Stones - Art Ingredients (Prima)
Glass Beads - Licorice - Art Ingredients (Prima)
Glass Glitter - Sterling - Art Ingredients (Prima)
Art Sugar (fine glitter) White - Art Ingredients (Prima)
Snowflake Punch (EK Success)
VersaMark Embossing Ink (Tsukineko)
Embossing Enamel - Aged Silver (Stampendous)
Flowers - Rodanthe (Prima)
Thread - Gold and White Gold (Gutermann)
Heart Puffy Stickers (Freckled Fawn)
Vellum
Palette Knife
Old Paint Brush
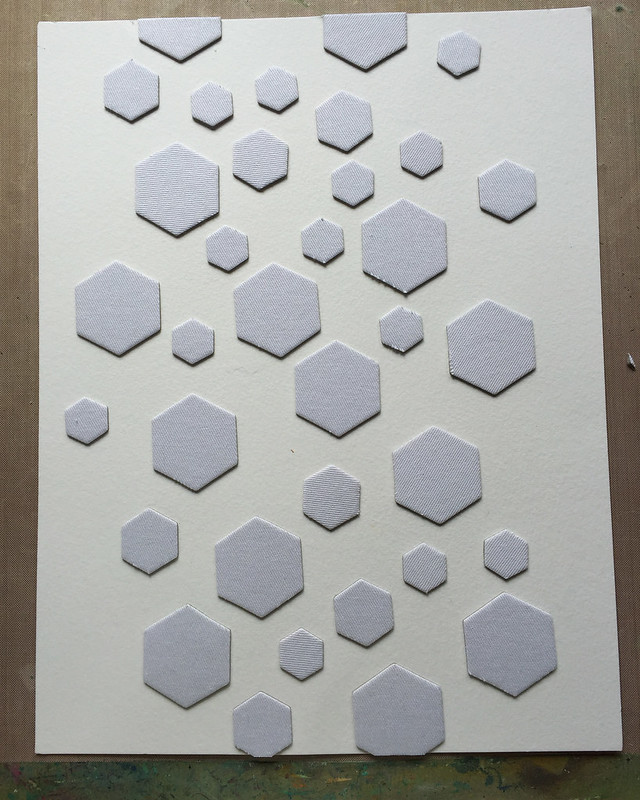
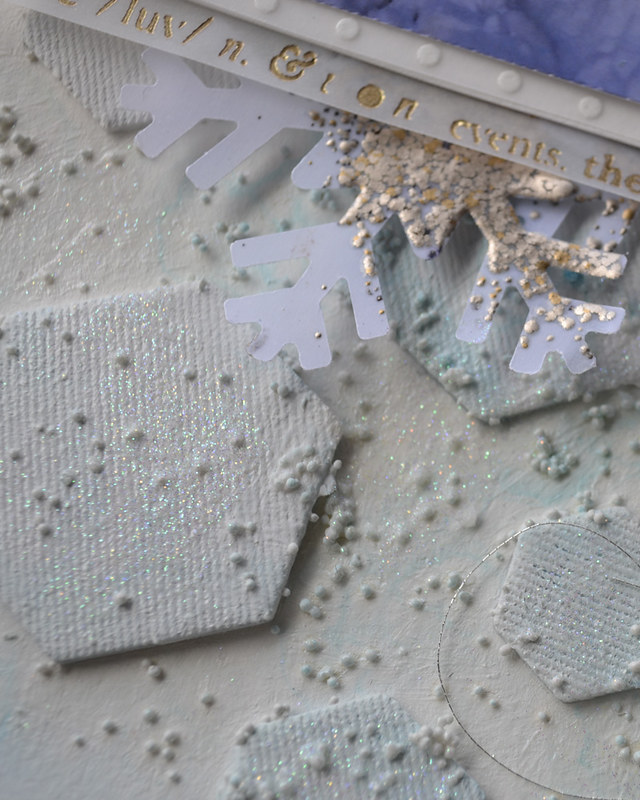
1. Place your embellishments on the page. I call this "Put Them All on the Page" and it's my favourite trick when it comes to using up products in my stash. This week, I just kept adding Mistables until I had a background that I liked. It took 35 pieces to make this background.
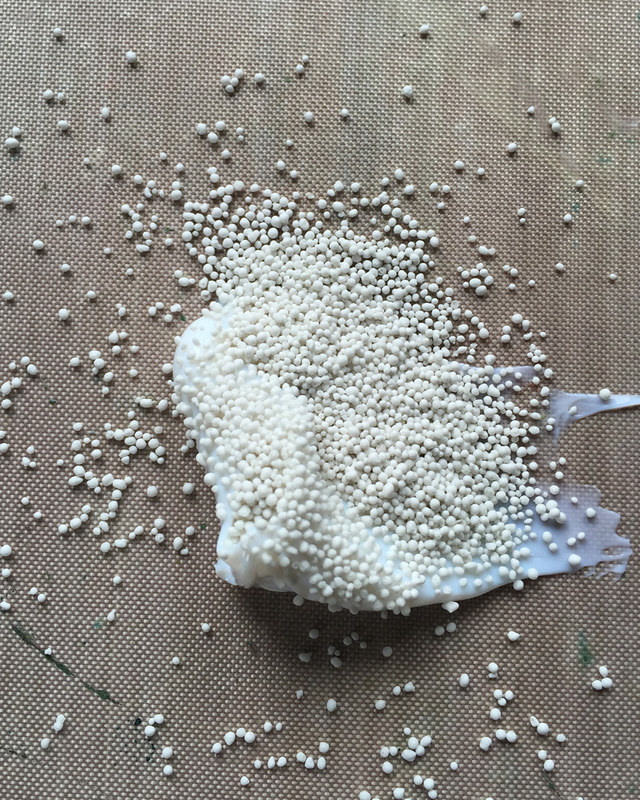
2. Mix Mini Art Stones with 3D Matte Gel. Scoop some 3D Matte Gel using a palette knife onto your craft sheet. Then gently pour the Mini Art Stones on top. I mixed them together using a palette knife.
3. Spread on background using an old paint brush. I wanted to break up the strong lines of the hexagons so I brushed the Mini Art Stones mixture on with a brush. I just kept moving everything around until I like how it looked. Then I set it aside to dry.
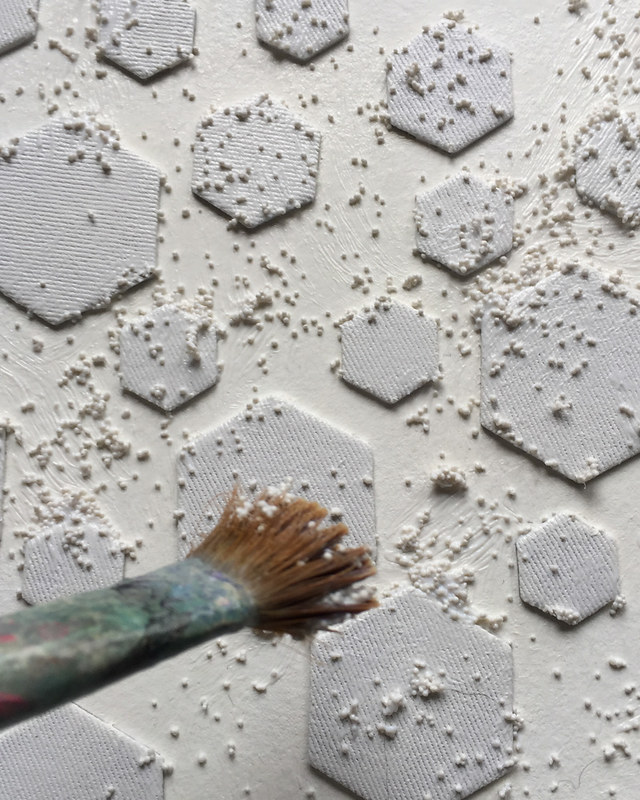
4. Mix Art Stones with Heavy Gesso. I mixed the Mini Art Stones with Heavy Gesso as I did in Step 2.
5. Apply Gesso mixture with old paint brush. I applied the Gesso mixture with my old brush making sure that I covered the whole background with gesso. 3D Matte Gel would act as a resist to my spray ink. By covering the whole background in gesso, I am covering up the 3D Matte Gel and making sure there isn't a resist effect.
6. Add spray ink. I spritzed the background with Fairy Pond spray ink and lots of water. This watered down the ink to give me the color I wanted.
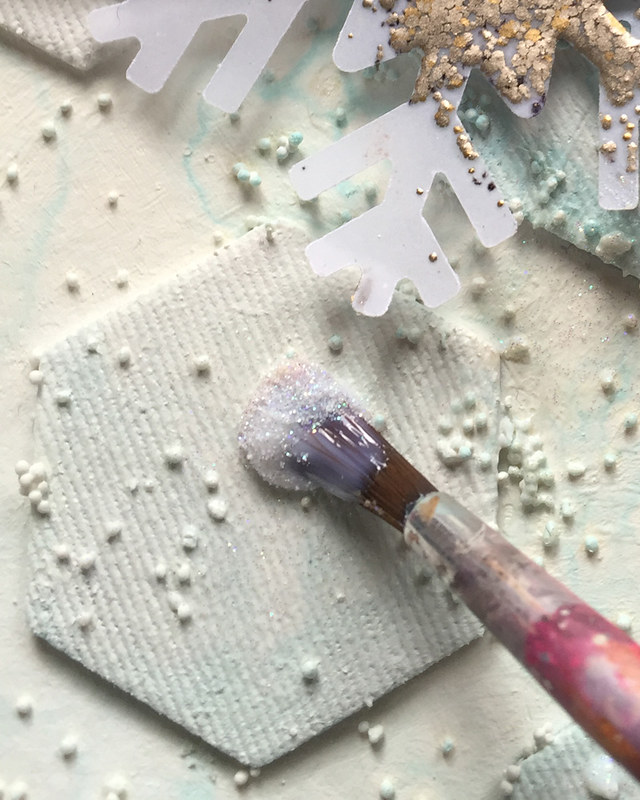
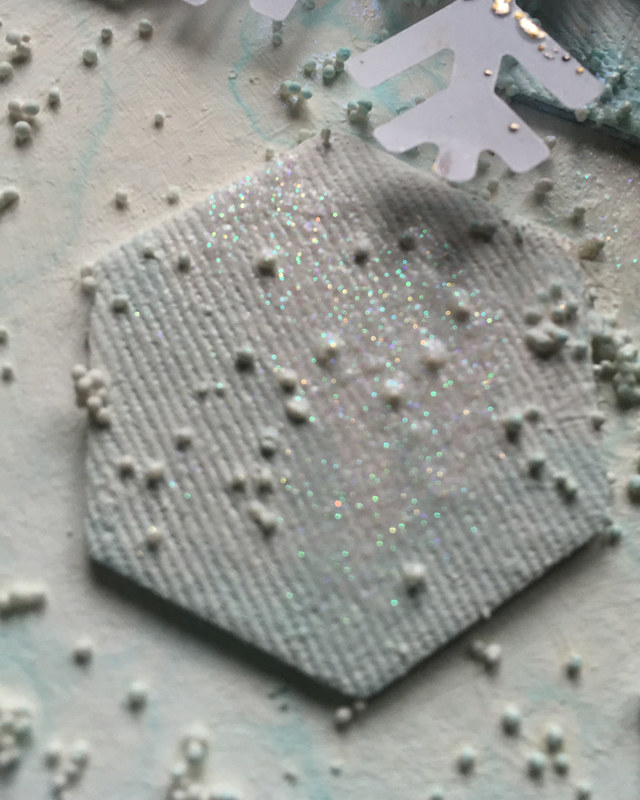
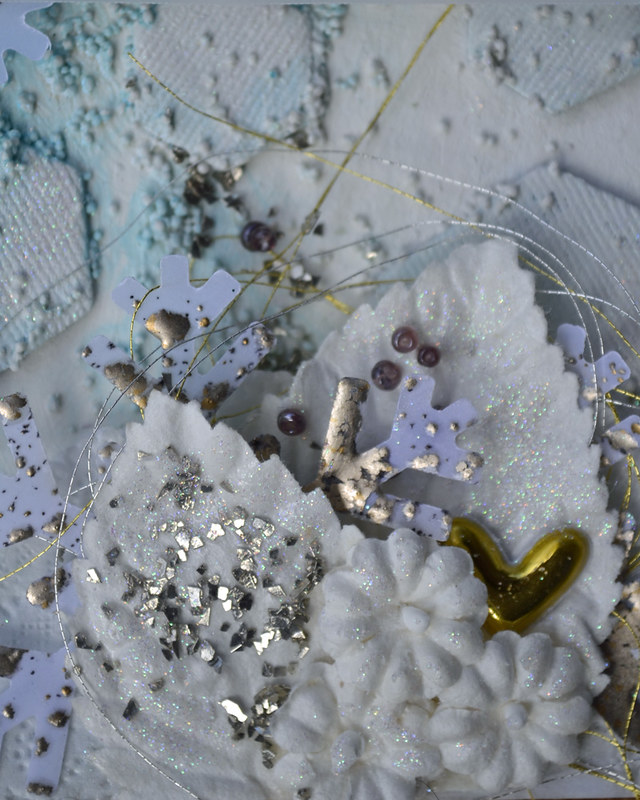
7. Embellish. This week, I used beads and glass glitter and fine glitter. The trick for adding these supplies to your layout without messy fingers is so simple. Simply dip your brush in Gloss Gel - I used Soft Gloss Gel but 3D Gloss Gel would be even better...
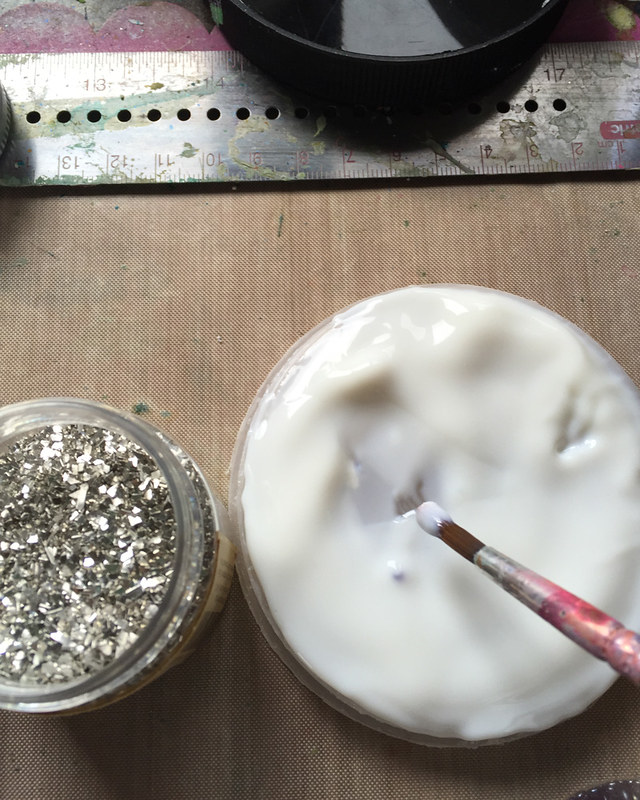
Then dip your brush into the glitter or beads or whatever. The glitter will stick to your brush like this.
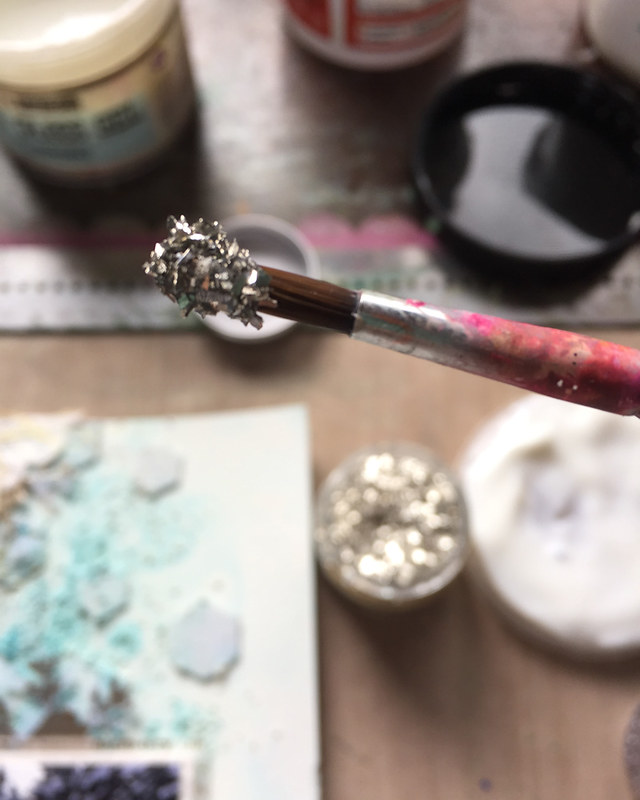
Then you can brush the glitter or beads into place using your brush. As long as the medium is wet, you can keep moving things around until you are happy.
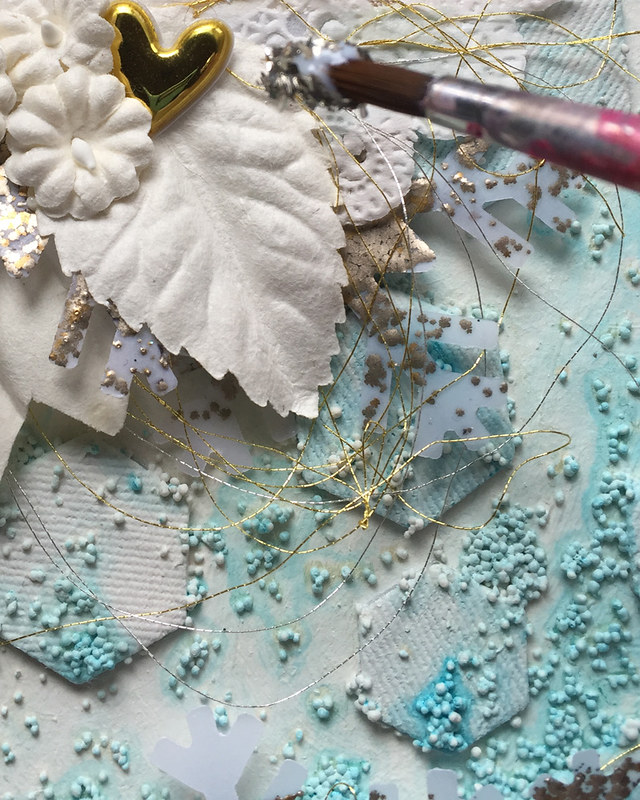
Here's a look at the leaves once the glass glitter is in place.
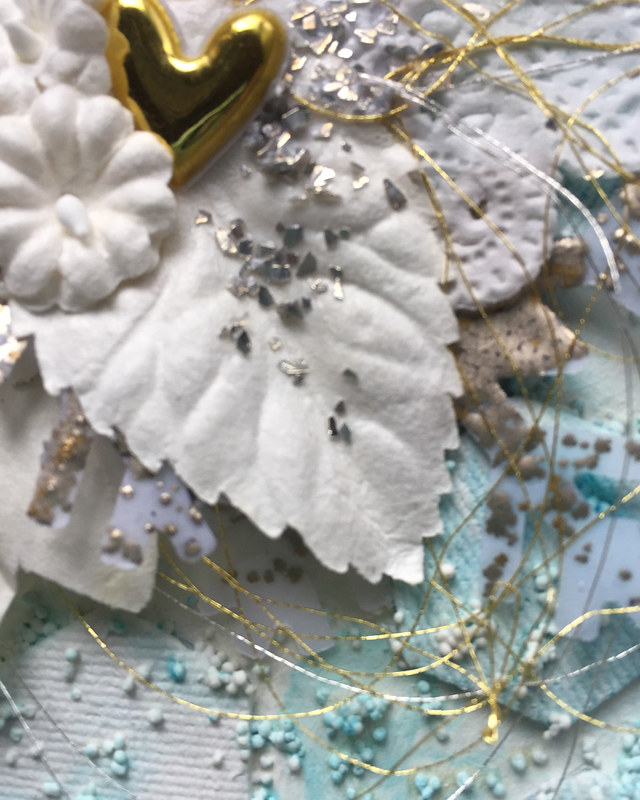
And here's a look at the same technique using Art Sugar - it's a super fine glitter that works great with this technique.
It leaves the most lovely shimmer behind when it's dry.
To create the snowflakes, I punched vellum with my snowflake punch. Then I pressed the snowflake shape into my VersaMark ink pad. I sprinkled the snowflake with Embossing Enamel and then heated it with my heat gun.
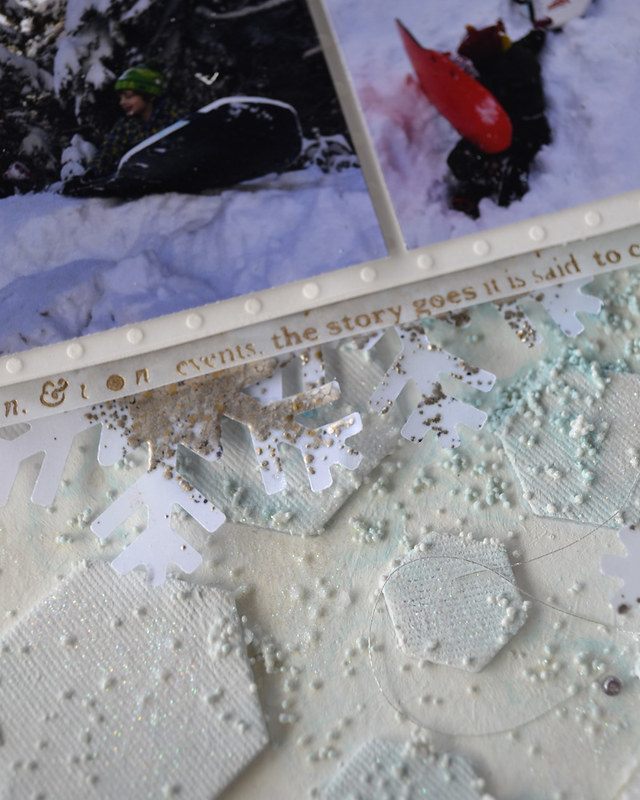
Here's a look at the texture you can make with beads, the Art Sugar, the glass glitter and the embossed snowflakes. It's the little details that add up to creative impact.
You may not have a pack of Mistables in your stash but I'm sure there's something you've been keeping. Putting everything on the page is a great way to use these products. I always say that it's more fun to look at a scrapbook layout then it is to flip through unused products. I hope you're inspired to give it a try.
As for me, I liked how this page turned out so I'm planning to use the leftover Mistables on a card front. When I do, I promise to share the results here.
Thanks for stopping by!
Cathie
nice work.....i like it...
ReplyDeleteclick it...: http://www.weaveron.com/