I recently found this not quite finished layout while tidying up in my office.

I really like it and that was the problem. I was afraid of ruining the layout so I didn't want to do anything else. When I found it again, I reminded myself that done was better than perfect and decided to finish it.
Here's my supply list...
Prima Art Basic Heavy Gesso
Prima Art Basics Double Sided Texture Brushes
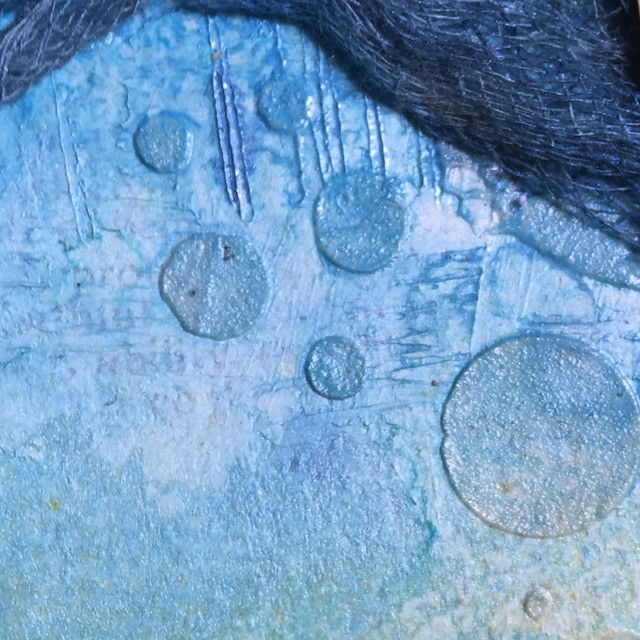
Prima Bubbles Stencil
Prima Heavy Gel
Prima Texture Powder
Prima Mixed Media Silicon Brush or palette knife
Prima Color Bloom Sprays
Friend Definition - Hero Arts
Black Archival Ink
Walnut Stain Distress Ink
Canson Watercolor paper
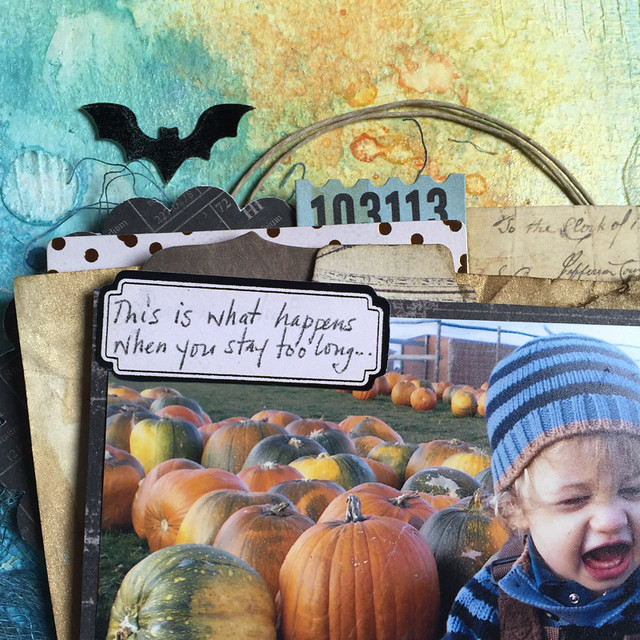
Ephemera Pack - After Dark Collection (Crate Paper)
Cheese cloth
Book paper
Twine
Here's how I made this week's layout.
1. Stamp. Stamp randomly on the background in Black Archival Ink. I used the Hero Arts Friend Definition Stamp. It's a text stamp so I use it a lot.
2. Gesso. Spread Gesso on the watercolor paper. I used the Prima Silicon Brush but a palette knife or old credit card works just as well.
3. Make marks. Make marks in the wet gesso using the Prima Double Sided Texture brushes or old credit cards or paper tubes. Whatever you have on hand that can make a mark will be fine. When you're happy with your background, set it aside to dry.
4. Mix Heavy Gel with Texture Powder. I make my mixture equal parts Heavy Gel and Texture Powder because I like the extra texture it gives when it's dry. I scoop out a blob of gel onto my craft mat and then scoop an equal amount of Texture Powder into the gel. Then I mix it together - thoroughly.
5. Stencil. Use a palette knife or silicon brush or old credit card and pull your Gel/Texture Powder mixture through a stencil. Leave the stencil in place.
6. Make marks through the stencil. Use a mark-making tool, like a texture brush, to make marks in the gel while it's well. Remove the stencil and set it aside to dry.
7. Spray background with ink. When your stencil pattern is dry, spray your background with spray ink. I'm still using the Prima Color Bloom sprays. For this layout, I used Summer Sky and Glistening Waves for the blue section and Sunshine, Sorbet and Yellow Mustard for the yellow/orange section. Set aside to dry.

8. Spray cheesecloth with ink. I love cheesecloth and use it on my layouts a lot. I didn't want to keep it white so I sprayed it with Color Bloom Sprays - Cobalt, Precious Stone and Vintage Coal.
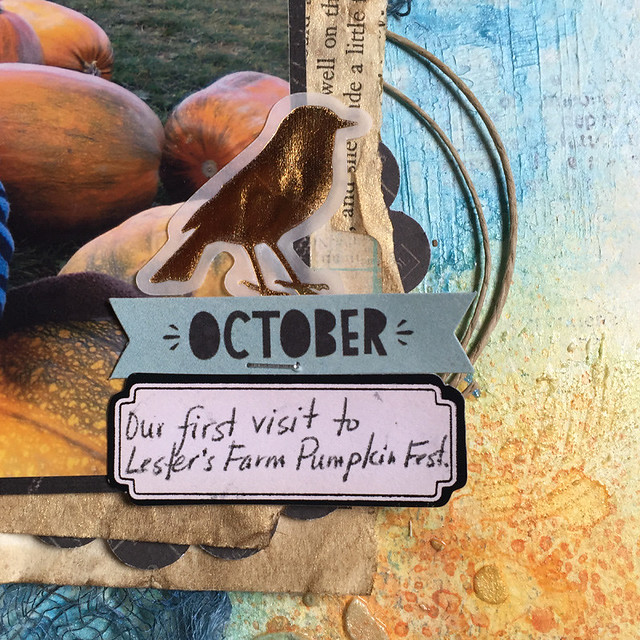
9. Embellish. This was where I picked up when I decided to finish this layout. I added some extra bits and pieces from the After Dark Collection by Crate Paper and twine around the photo.
Here's a look at the finished layout.
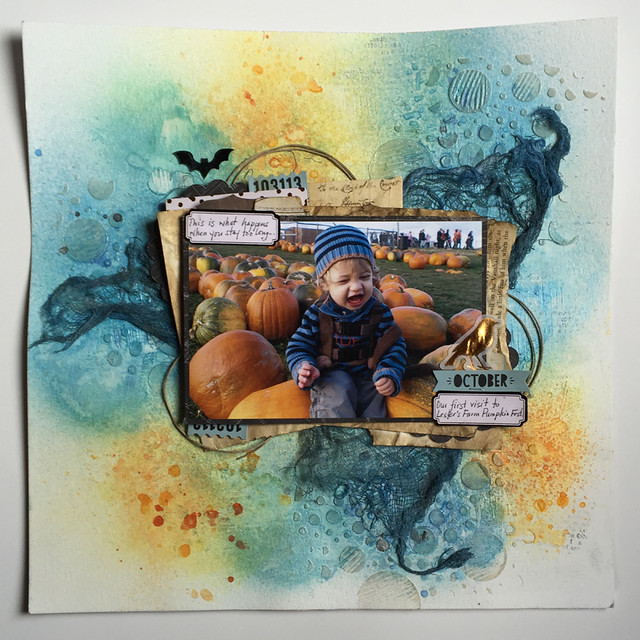
It only took a little bit of embellishing and the journaling to finish the layout. The journaling was tricky because this layout needed journaling but I wanted the photo to remain the focus. When I'm not sure what I want to say, I write out my journaling on scratch paper. This helps me figure out what I really want to say without ruining any supplies in the process. It's a win-win process that works for me every time.
If you have any questions about supplies or techniques used to make this layout leave a note in the comments.
Thanks for stopping by.
Cathie
No comments:
Post a Comment