Thursday, 31 May 2012

the Undones: Ben's Baby Book

note: on Thursdays I blog about projects that aren't quite done.  Maybe they needed some journaling, or photos or both.  I call them "the Undones" and I have a box full of good intentions. In this series, I pick a project, finish it and share the results. I'd love it if you would play along and share a link to your newly finished project in the comments.
 
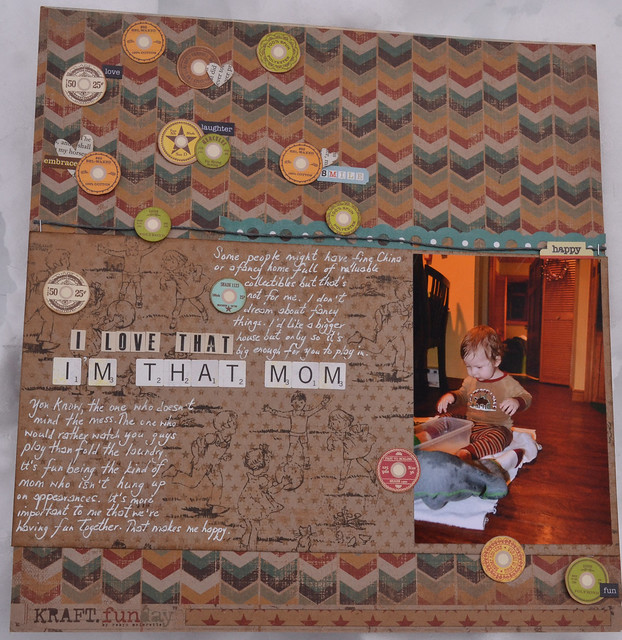
A project that has been weighing on my mind lately has been Ben's baby book.  It seems wrong that I have his first birthday scrapped but not his very first days.

So, what's the problem? Well, there are actually 2 problems.

1. It's too special. You know, that fear of messing it all up because it's important. It's silly, I know, but I think it's a very common obstacle for scrapbookers.

2. It's a big-ish project that is going to take me many hours to finish. These kind of projects are easy to put off as I don't have a large block time for scrapping.  

The solution for both of these problems is to just get started. So that's what I did at The Paperie's most recent crop night.  I had all my supplies and pictures in a plastic box so I brought them and got started.

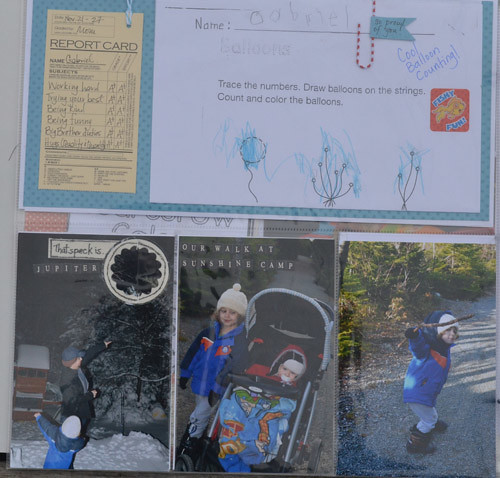
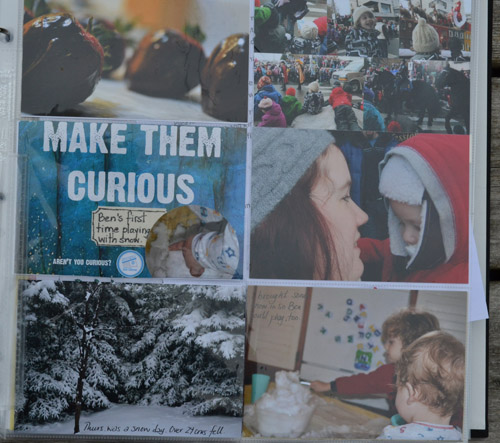
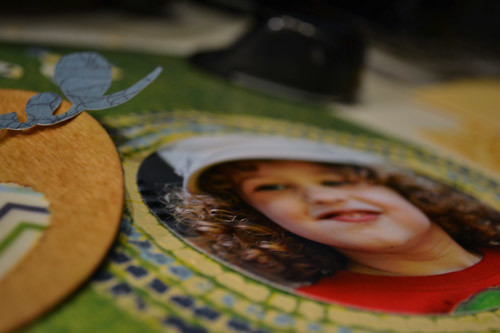
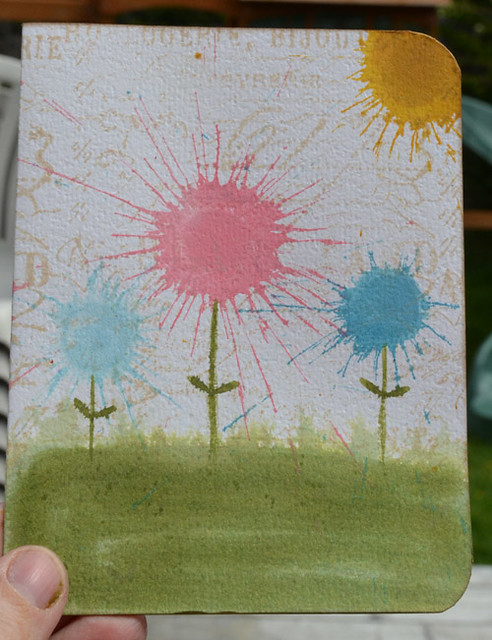
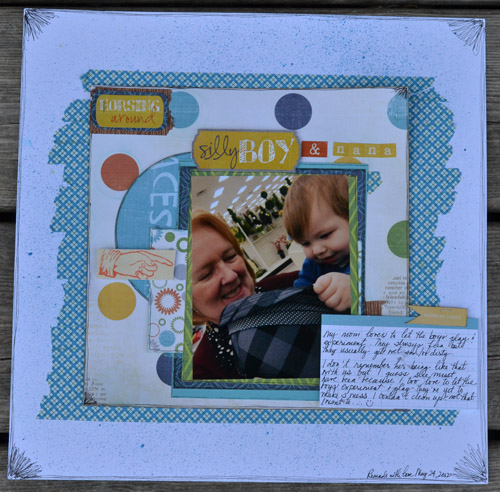
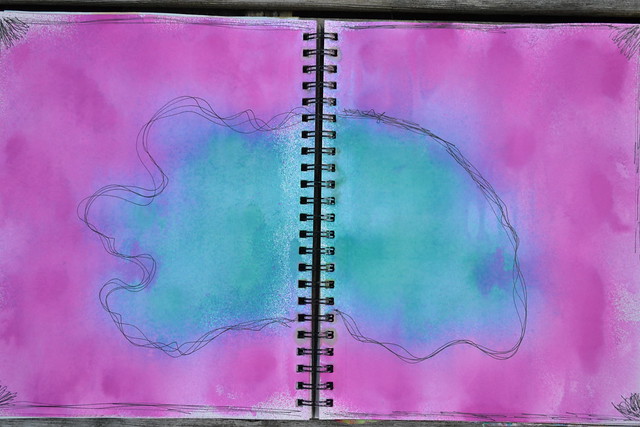
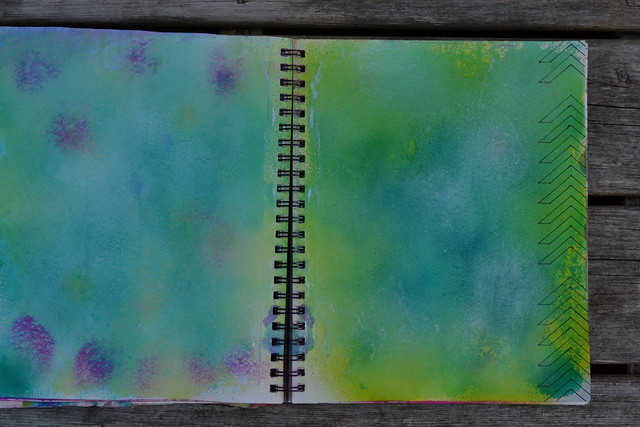
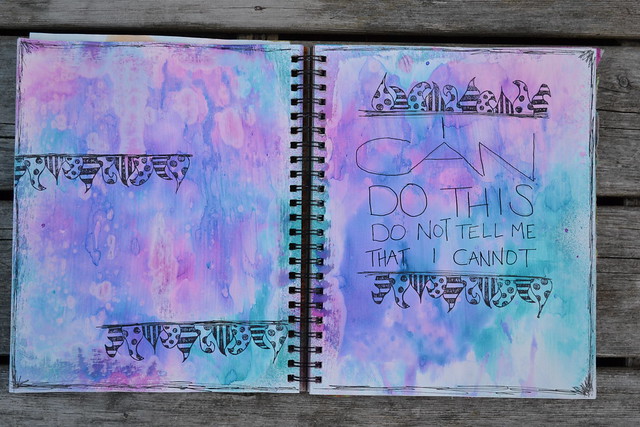
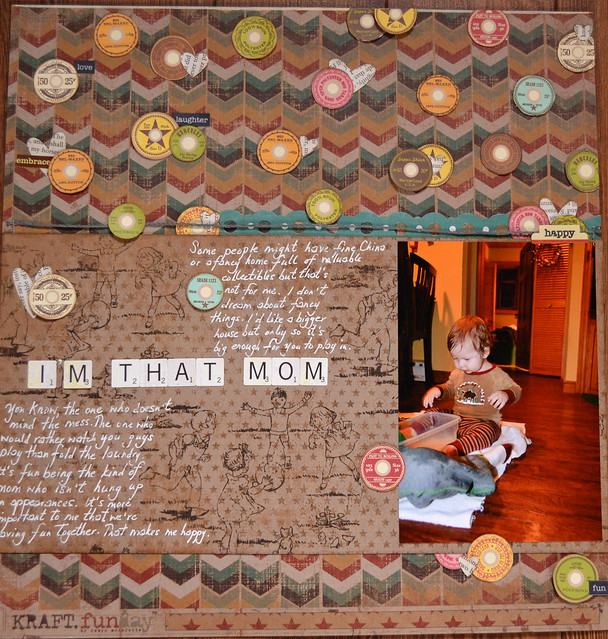
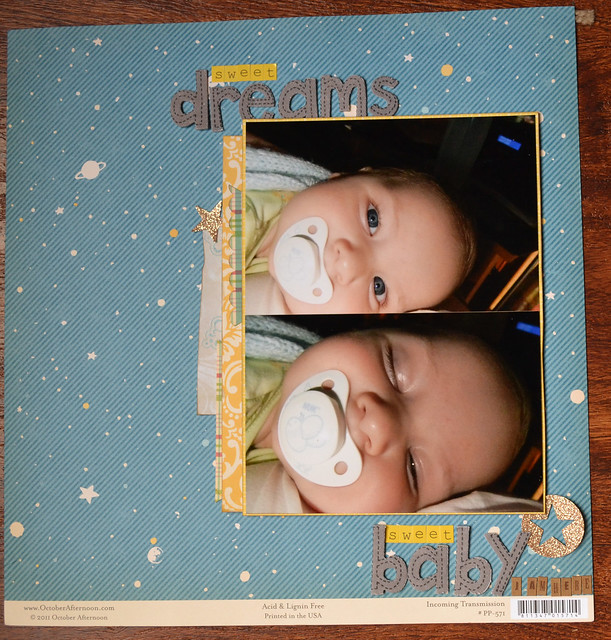
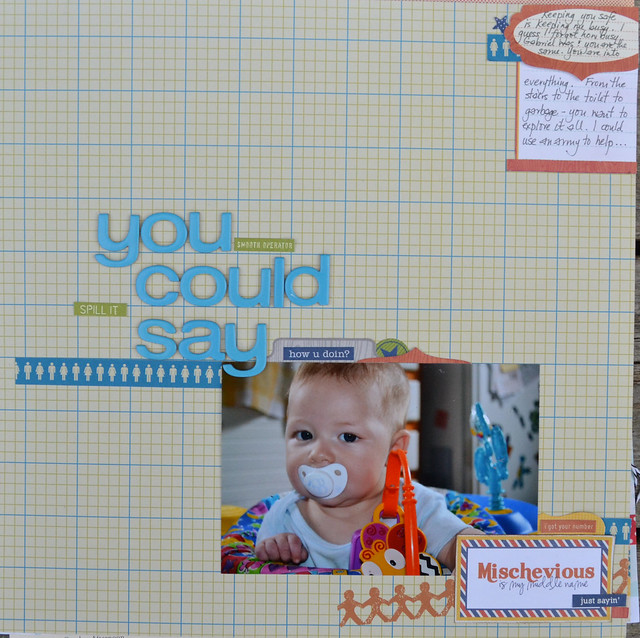
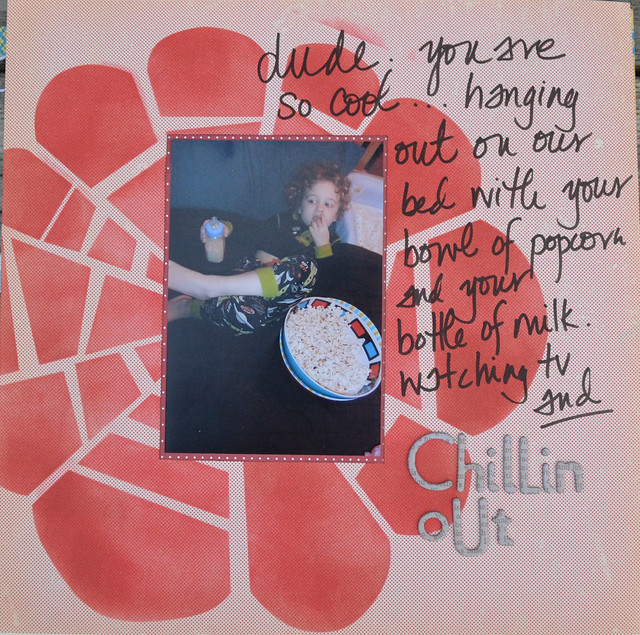
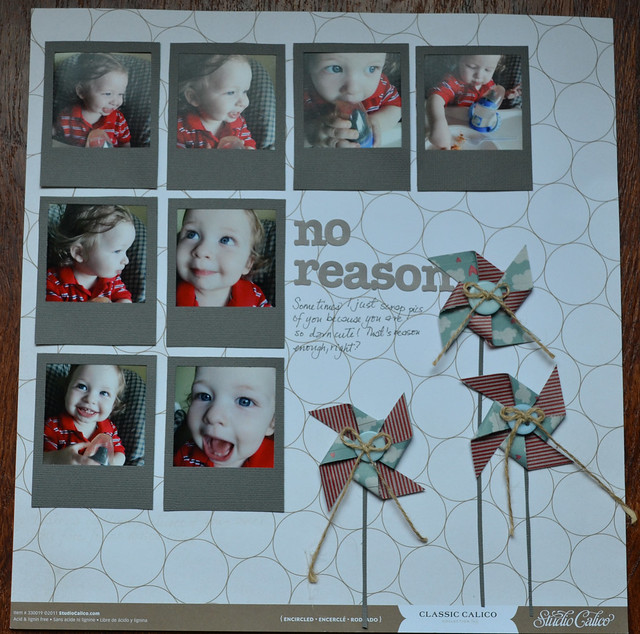
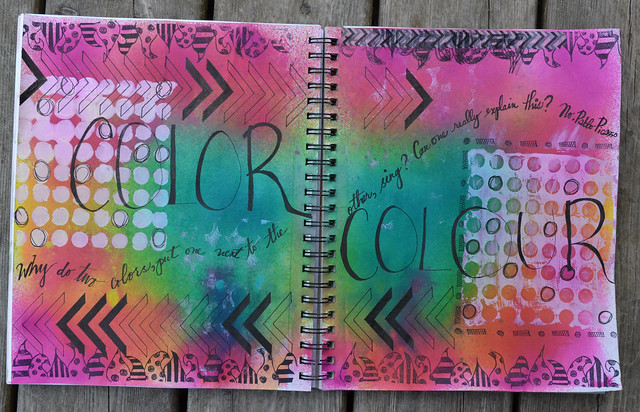
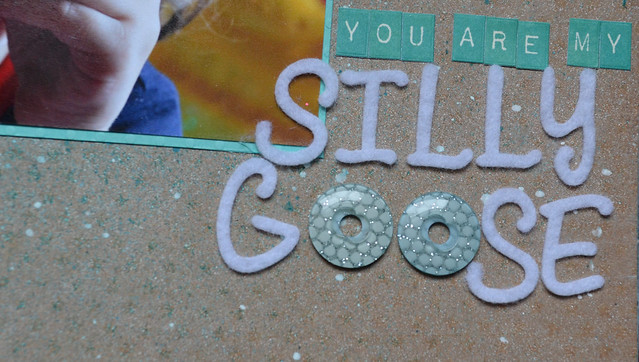
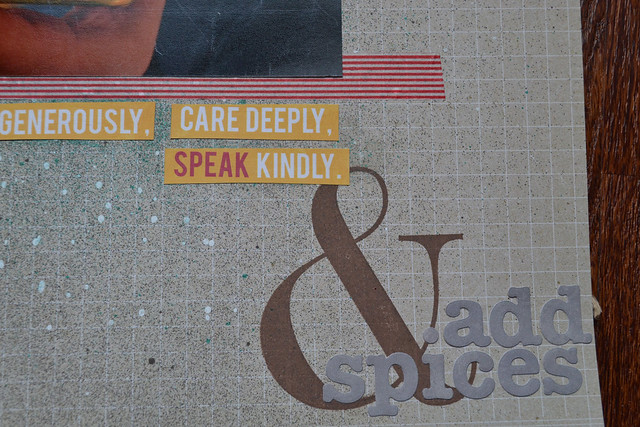
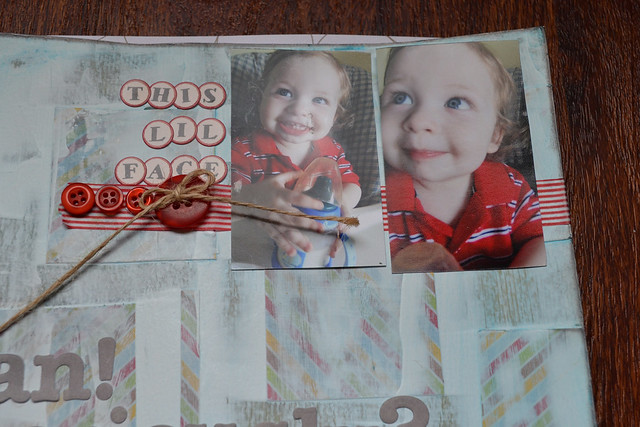
Here's what I have so far...

DSC_0030_edited

DSC_0031_edited

DSC_0032_edited

DSC_0033_edited

DSC_0034_edited_edited-1

DSC_0035_edited

DSC_0036_edited

DSC_0037_edited

DSC_0038_edited

DSC_0039_edited

DSC_0040_edited

DSC_0041_edited

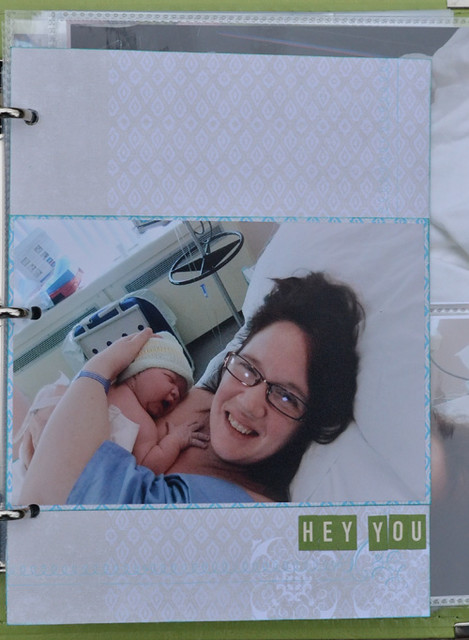
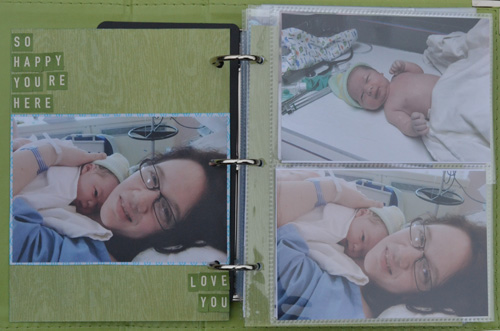
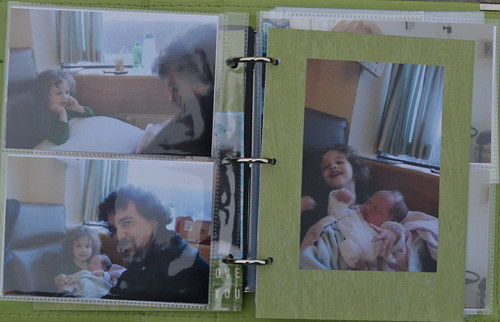
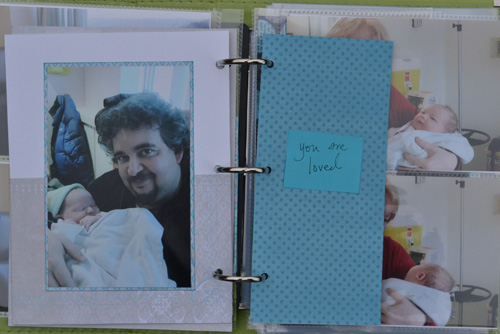
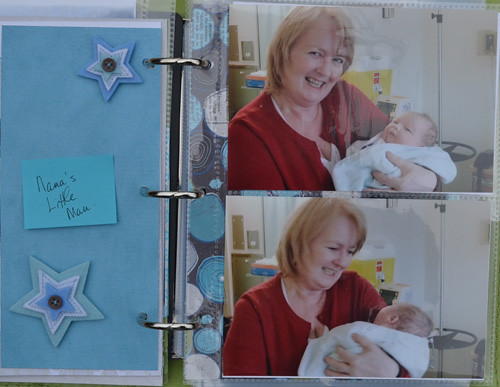
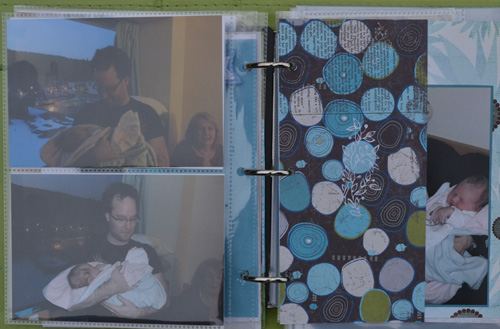
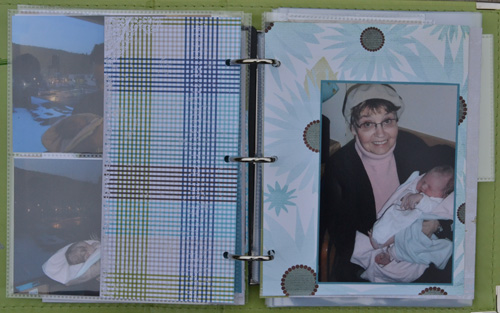
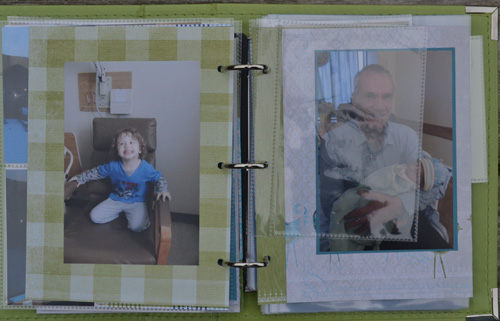
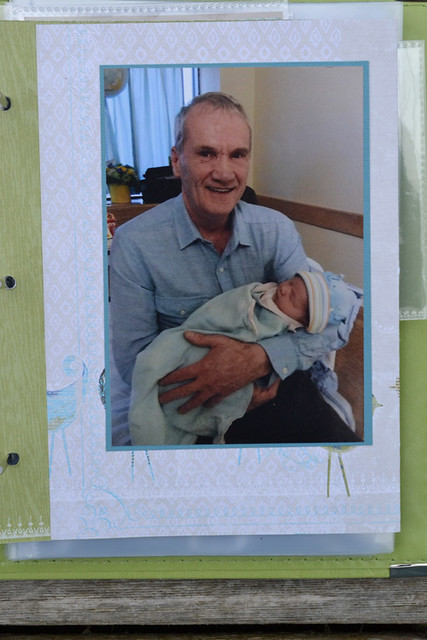
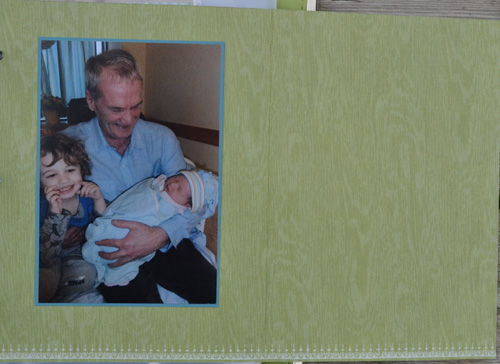
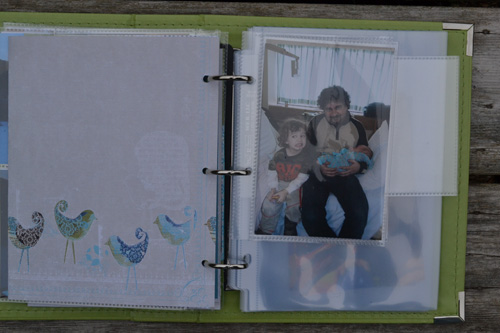
I'm really surprised how much work I did in a few hours. I think it's a good start but obviously there is a lot more I want to do.  There's not a lot of embellishing and there's very little journaling.

I'm using the We R Memory Keepers 5.5 x 7.5 album, the Twig collection from My Little Yellow Bicycle and the 8x8 Lickety Slippers variety pack.  I used them for my Week In the Life album and I loved how that turned out so I figure these products will work again.

I'll keep working on it and post my progress on Thursdays until I get it finished.

Thanks for stopping by!

zove

Cathie

Wednesday, 30 May 2012

3 Reasons Why I Broke up with Project Life...

Let me be clear, this is not a bash-up of  those who use and love PL. I love the idea, the products and all those PL blog posts. Those alone are addictive and so inspiring. And all those printables? Oh my!

But I couldn't make it work and here are the 3 main reasons why:

1. The commitment was too big.  It was taking me hours to finish the spread each week. Time that I wanted to spend making layouts.  I really don't have time to do both so I had to choose.  Sorry, PL.

2. I wasn't having fun. What's the point of forcing myself to do something that is supposed to be fun? I already "have to" do lots of things like plan meals and change diapers. Although PL was never that bad, I really didn't want to add one more thing to my "to do" list.

3. I like to journal a lot.  I'm rarely stuck with what to write. I usually have a problem trying to fit it all in. I'm always editing stuff out. Always. I know I could have added inserts but I didn't want the year to span a couple of albums. I mean, where would I put them?

For a long time I felt like quite the failure for not sticking with PL.  So many scrappers are doing such wonderful work and they all talk about how they love it. I just didn't feel the love.  And in the end, that's ok. I'm not a failure because memory keeping isn't about success or failure it's about preserving what matters to you. 

So, keep doing what you're doing PLers.  I'm quite happy to watch from the sidelines.

zove

Cathie

ps: Here's a look at one of my spreads just to prove that I really did try.

DSC_0010_edited

DSC_0011_edited

pps: I totally reserve the right to completely change my mind about PL at any point without any notice. : )


Tuesday, 29 May 2012

Designer Duo: Sneakity Sneak

I am so excited to share a sneak with you today of a page that I made for my Designer Duo class.  I'm co-teaching it Sunday at The Paperie with my friend, Sara.  She came up with the idea for the class and it's awesome.  We each take the same products, make something and then share how we made it with the class.

Honestly, it is always a challenge for me to stick to class supplies. I always want to add something from my stash but the thing about challenges is that if you stick with it and work through the uglies (as I assure I did with this layout) the reward is worth it.

 Yup. I'm excited. So here's a peak at my layout.

DSC_0008_edited

I promise to share a full shot next week but if you can't wait until then, sign up for our class. 

Did I mention that's Sara's project is amazing? Cause it is!

Hope to see you Sunday!

zove

Cathie


Monday, 28 May 2012

Three Cards using Splattered Distress Stains Technique

hey, hey!

So, how was your weekend? We were busy and part of the reason was a birthday party for one of Gabriel's little friends on Saturday. So, I whipped up a quick card using a simple and fun technique, called Splattered Stains, that I picked up from my friend, Sara. I've made 3 cards with this technique so I thought I would share it with you today.

First up, here's the card we made in class.  

DSC_0004_edited

For this technique, you need some Tim Holtz Distress Stains.  Any colors will do.  Distress Stains have a felt applicator with a valve.  The valve keeps the Distress Stain under control but for this technique you're going to work against the valve.  To make the "splat", you simply squeeze the sides of bottle as you (forcefully) splat the felt applicator on your paper.  The harder you splat, the bigger your splatters.  It's ridiculously fun and very addictive.

The splatters made this cute monster birthday card...

DSC_0005_edited

...and another birthday card.

DSC_0006_edited

I have plans to make more of these for Gabriel's preschool teachers.  Something like, "teacher, you're out of this world!"

So, get your Distress Stains out and start splatting. If you come up with some other ideas, I'd love it if you'd share in the comments below.

That's all for today. Thanks for stopping by.

zove 

Cathie

Friday, 25 May 2012

Art Journal Everyday

Hey, hey!

Today is pretty big day for me as I'm guest posting at the lovely Julie Fei-Fan Balzer's blog. So, if you haven't seen it, please pop on over and have a look.  You can find my post here.

If you're visiting from Julie's blog. Thanks for coming by.

I have another page to share today. I made the background ages ago when I first started experimenting with modelling paste. It's so much fun.  I colored the background using Claudine Hellmuth Studio Paints and some Adirondack Color Wash. 

DSC_0065_edited

One little thing about modelling paste, it can get pretty gloopy and make it hard to close the lid. Make sure you close the jar properly though or it will dry out like mine did. oops!

And here's a close up of the texture.  I hope you can see it.

DSC_0064_edited

To make the tree and house, I cut up some book paper I had lying around from an altered book project.  I doodled around the edges - just because.  I also colored the tree's "leaves" green using Distress Ink. The tree trunks are Amy Tangerine washi tape - love that stuff.

Thanks for stopping by.

Hope you have a wonderful sunny weekend.

zove

Cathie


Thursday, 24 May 2012

the Undones: Reworking a page

Last week, I shared this page from this post...

DSC_0897_edited

I knew the page wasn't done because the story was missing and I just couldn't see how to get it
onto that page.

So I cut it apart. I cut a big square around the photo collage element and put it on a white background.  That wasn't right either so I spritzed a little Sailboat Blue from the Adirondack Color Wash line by Ranger.  Much better but not quite there.

Time for washi tape!  I made a mat for the photo block using washi tape and that solved my problem.

Here's the final layout.

DSC_0061_edited

I added some doodling around the edges of all my papers and love how it looks.  I hope you do too because I'm pretty sure you'll be seeing more of that technique.

And here's a close up.

DSC_0057_edited

All in all, I'm so happy I didn't give up on this layout. It's not always easy to work through a problematic page.  It's definitely a slow process but it has lots of opportunities to learn and try new techniques or products. I can't tell you how long it took me to make this page but it would probably be a couple of hours. It was totally worth it.

So, dig out a page that's not working. Take a picture of it and see if that helps you figure out what's wrong.  If that doesn't work, rip it apart and start over or cut it up and try again.  You can figure it out if you just give yourself a little time.

I'd love to hear what you think of my rework.  You can either leave a comment or tweet me. My handle is @cathiereed.
 
Happy scrapping!

zove

Cathie


Wednesday, 23 May 2012

Hey, hey!

Sorry I was MIA yesterday. I was finishing up some contract work and enjoying the amazing sunshine.

So...a quick post today about a card that made itself.  My scraps live in 1 of 2 baskets.  One basket holds small scraps of my absolute favorite paper that I can't bear to throw out. The other basket is for my larger scraps.

The idea for this card just appeared one day when the scraps lined up in my small scrap basket. 

DSC_0054_edited

The hearts in the old Basic Grey plaid paper came from using the My Favourite Things Hearts a Plenty dienamic die and the teal chevron paper came from my last Paperie Pick post (which you can read here).  These pieces came from two totally different projects but work so well together, don't you think?

I just stapled the pieces together using my Tim Holtz Tiny Attacher and stamped the sentiment with the Hero Arts, Sending Smiles set.  Then I put it on some kraft cardstock.  It was that easy.

Here's a close up of my card.

DSC_0055_edited


So, the next time you're picking through your scraps, keep your eyes open.  You never know what great combinations are there waiting to be discovered.

zove

Cathie

Monday, 21 May 2012

Art Journal Everyday...pages in progress

Hey, hey!

Last week was a crazy week around here without a lot of creative time.  Even though I finished a couple of big projects recently (LayOut a Day and Week in the Life), I missed being creative every day.  It's always a balancing act, isn't it?

Fortunately, with the help of my new Dylusions spray inks, I was able to get a few pages started.  Here
they are...

DSC_0971

DSC_0972

DSC_0973

I gessoed this last page before spraying the Dylusions and got a totally different effect. Neat, huh? I've also started using 2 page spreads which I really like. I have no idea what I'm doing with any of these pages but that's the fun part of art journaling, right?

Fingers crossed for some creative time for all of us this week.

zove

Cathie


Thursday, 17 May 2012

3 tips to get that layout done!

hey, hey!

It's Thursday and that means the weekend is in sight - yays! And it's a long weekend too - double yays!

But  I digress.  Today is about getting those pages and projects done and I have a couple of tips that might help with the most common roadblocks.

Problem 1: "There's something missing but I don't know what!"
Solution: Take a picture of your layout, upload it to your computer and have a look.  Sometimes just looking through my camera view finder is enough for me to see that something isn't right.  The smaller image size makes it easy to examine your whole page for balance and flow.

When I took a picture of this page, I could see right away that I needed more circles and I had to fix that title. Now I'm much happier with this page.

DSC_0967_edited-1

DSC_0309_edited


Problem 2: "I don't know what to journal."
Solution: Imagine what you would say to some one if you showed them the page without any journaling. This always helps me figure out my story. You don't need to write a lot - even one sentence can be just what a page needs to finish it off. Then make the time to write it down.

That's what I have to do with this page...

DSC_0964_edited

Problem 3: "I don't have enough room for my journaling."
Solution: Make your journaling a design element right from the start.  It's that easy. You can even write it out before you get started to see how much space you need. Just leave space for your story and you will write it down.  Most people can't leave a blank space on their page.

That's the problem with this page.  I have a story I want to tell but I don't know where to put it. If I had made the journaling a part of the design I wouldn't have this problem.  So, I'll either hide the journaling or pull the page apart and try again.

DSC_0897_edited

I hope these tips help you finish some your own "undone" projects. If you have any questions or any tips of your own to share, please leave a comment.

Wishing you some crafty time this weekend.

zove

Cathie

note: on Thursdays I blog about projects that aren't quite done.  Maybe they needed some journaling, or photos or both.  I call them "the Undones" and I have a box full of good intentions. In this series, I pick a project, finish it and share the results. I'd love it if you would play along and share a link to your newly finished project in the comments.


Wednesday, 16 May 2012

3 things I learned from my LOAD Challenge plus round up

Well, this is it.  The end of my LOAD or LayOut-A-Day challenge. What a relief.

So here are the last of my layouts...

Using up some leftovers from previous Paperie kit clubs.

DSC_0927_edited

Scrapping some pictures that had to be scrapped.

DSC_0925_edited

Trying a look that's not really my style (I love it anyway).

DSC_0922_edited

Scrapping a picture I totally love of my youngest brother, Jonathan.

DSC_0923_edited

And playing with my newest most favorite stamp set.

DSC_0924_edited

Emboss with white powder on watercolor paper and then watercolor with Stormy Sky Distress Ink and you have the coolest waves ever, people!

DSC_0928_edited


And the final two projects from my design team layouts...


DSC_0881_edited

DSC_0878_edited


So, what did I learn.

1. Be prepared to compromise.  Some days I just had to be content with the fact that a page was done and a story documented.
2. Keep your stuff organized (whatever that means to you).  For me, it's pictures and stories because they matter the most to me.  I love my supplies (especially my patterned paper stash) but I reach for my pics first - every time. I'm faster if I know where to find the pics I want to scrap.
3. Just do it.  Set aside some creative time and then create. Some days the hardest part was making myself sit at my desk but I did and I was always the happier for it.

You can check out past LOAD posts here, here, here and here.

In case you're wondering, the final tally was 34 layouts in 30 days. I created 26 LOAD layouts and 8 for design team projects. 

Thanks for sticking with me through all these crazy long posts and for cheering me on.

zove 

Cathie


Tuesday, 15 May 2012

Design Team projects...Day 2

hey, hey!

Here are a couple more of the pages I made for this month's Paperie's kit club, Star Bright

First up,

DSC_0880_edited

I was inspired to make the Polaroid frames by Krista and a demo she did at the Retreat with her  2" punch. A lot of my childhood pictures are Polaroids so I wanted to try this out.  I used a bunch of wallet photos I had left over from my Week in the Life project but just wasn't finished scrapping.

I'm particularly proud of the pinwheels though because I made them using washi tape and the 2" squares I punched out to make the Polaroid frames. I just couldn't throw all those little squares away so I covered them with hearts and clouds washi from my stash on one side and the red stripe washi that comes in the Star Bright kit.

Next up, 

DSC_0876_edited

This page came together pretty easily.  Probably because I love that picture - it is so typically Sam.  This is also from my Week in the Life. I printed this one a bunch of different sizes because I knew I was going to use it more than once - this is a 5 x 7.  The text is from the Jillibean Soup journaling block I cut up.  Finally, I used the ampersand stamp from Hero Arts, SC Mister Hueys in Dark Calico and White Calico, and the Jillibean alpha.  I'm thinking about using this in our kitchen when I get it back.

I'll be back tomorrow to share the layouts that finish up my Lay Out a Day challenge. Thanks for stopping by.

Have a good one.

zove

Cathie


Monday, 14 May 2012

another manic Monday...

I don't know about you but I am not a Monday morning person.  I guess it's the transition from weekend to weekday.  However, I have a big coffee so I will make it through.  No worries.

The Paperie's kit for May, Star Bright, went live over the weekend and it is not one to miss.  There's Studio Calico and My Mind's Eye papers, a roll of washi tape, 4 alphas, the cutest buttons and more.

I love buttons but because I rarely use them I try to not buy too many.  But when I found these teal sparkly buttons in my kit I knew just what to do with them...

DSC_0872_edited

From my own stash, I used some Studio Calico Mister Huey White and the new Dylusions spray ink, Vibrant Turquoise.  This layout came together so easily. I love it when that happens, don't you?

Now, here's a layout that took forever to get right. I must have tried at least 8 different ways to get to this point.  It was very frustrating but I stuck it out for about 2 hours (no joke).  Thank goodness washi tape is so forgiving because I moved it all around the page and it didn't damage anything and it didn't leave any sticky residue either.

The hearts and cloud washi tape is from my stash and I used a little sprinkle of Mister Huey Clay but everything is else can found in the kit.

DSC_0870_edited

Here's my last one for today. It's pretty simple but that gorgeous Jillibean Soup paper makes it something special. Except for the washi tape this is pretty much all Jillibean Soup because you get one of their element sheets in the kit this month. I love those.  Makes it so easy to layer up your layout.

DSC_0874_edited


I'll be back tomorrow to share the rest of my layouts. 

Thanks for stopping by.

zove

Cathie


Sunday, 13 May 2012

around here...Mother's Day


DSC_0900_edited_edited-1

she...
...had a lovely Mother's Day.
...is very happy to have two happy healthy boys.
...is very busy these days but is happy to be doing what she loves.
...spent the evening with her Mom - that was lovely.

he...
...is still a Wii fiend.
...has started playing with his trains again.
...is starting to read.  I mean, really read.  It's exciting.

he...
...is walking absolutely everywhere. Won't be long before he's running.
... is teething again. Teething is hard for him so he's not sleeping well, poor little love.
...will give hugs and kisses if you ask for them. It's so adorable.

he...
...once again managed to avoid the camera this week.
...worked hard all day so she could have her lovely Mother's Day.
...bbq's the best steak - ever.  No lie.

And that was our week.

Hope you had a wonderful one, too.

zove

Cathie

Saturday, 12 May 2012

Art Journal Everyday

Finally. The end of a super busy Saturday.  Time for a quick post about my art journaling adventure this week.  And it was awesome because I finally got a chance to play with some of the products from the Dylusions line.  yays!

I picked up 4 bottles of spray ink at The Paperie Retreat last weekend and this week I managed to get my hands on this stamp set. 


Oh. the. joy. My favorite one is the second  - I call it the "tentacles".  I have such plans for that stamp. You'll probably notice it popping up here and there.  And while I was at it, I remembered Julie using her chevron stencil and tracing the outline to create arrows (sort of) so I tried that out too. Here's a link to that post.

Here's my page for this week...


DSC_0888_edited_edited-1

Crazy, huh? I could have stopped after I misted with the Dylusion sprays and blended with water but that would not have been much of a page but the color was definitely the inspiration hence the quote and the 2 spellings of the same word.

The quote that wends its way across the 2 pages reads: "Why do two colors, put one next to the other, sing? Can one really explain this? No." Pablo Picasso. 

And that's it for another week.  Thanks for popping by.

zove 

Cathie

Friday, 11 May 2012

Sneakity sneak...Star Bright Paperie May Kit Club

Hey all,

I had a blast with The Paperie's kit again this month.  There's always something in there that I would never have picked for myself but end up loving.  This month, it's the red stripe washi tape. I used that red tape on so much this month I have to pick up some other stripey colors.

On to the sneaks...

Check out the buttons...

DSC_0873_edited

...and the Jillibean soup note cards.  Krista used the card to make this project but I cut my apart.

DSC_0877_edited

I used mixed media techniques to get this page and more of the red stripe washi. Did I mention I love that tape?

DSC_0879_edited


Did you notice that there are 4 different alphas in this kit? Awesome.

If you're heading to the store to pick up your kit, why not wait until tomorrow? The Paperie is throwing a birthday party (aka big sale) and bake sale on Saturday. Krista is the supreme-baker in charge of supplying the treats through her company, Taffety.  Just check out the pics she has on her blog today - drools...

Hope to see you tomorrow at The Paperie. If not, Happy Mother's Day to all you awesome moms and I hope everyone has a fab weekend.

zove

Cathie

ps: I usually post about art journaling on Friday.  I hope to be back later today or maybe tomorrow with that post.  Follow me on twitter or subscribe to this feed and you'll be the first to know when I update my blog.