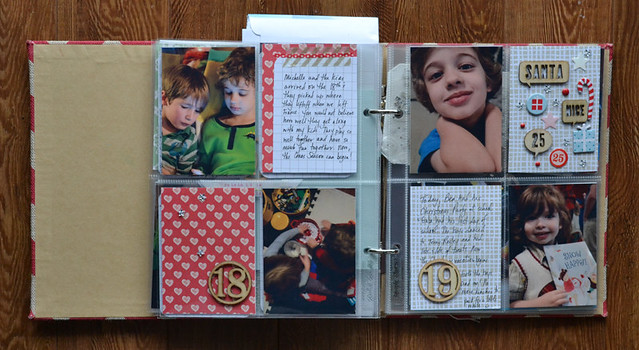
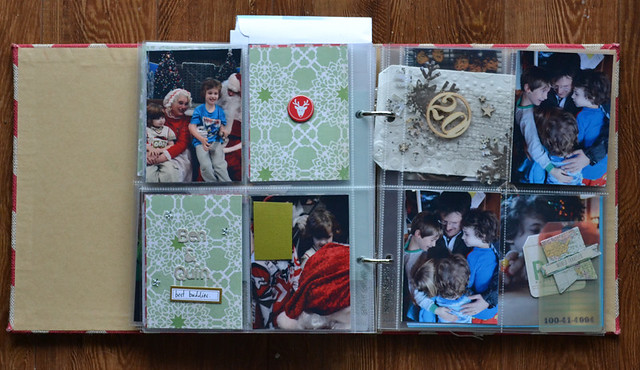
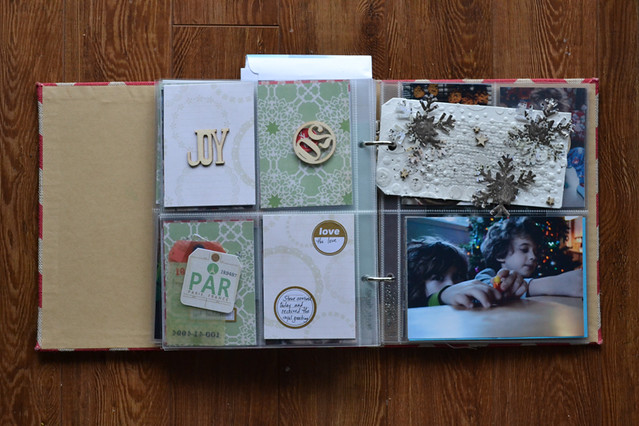
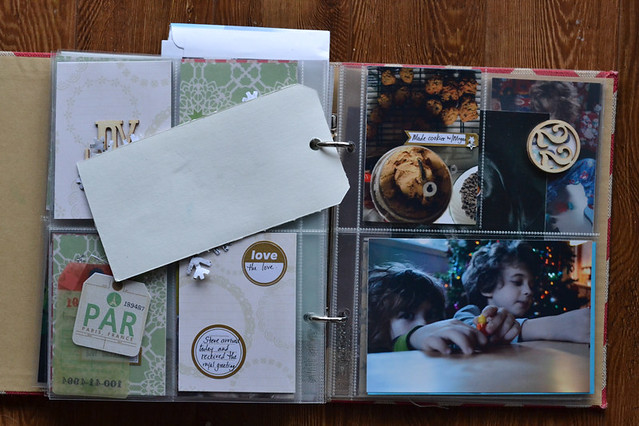
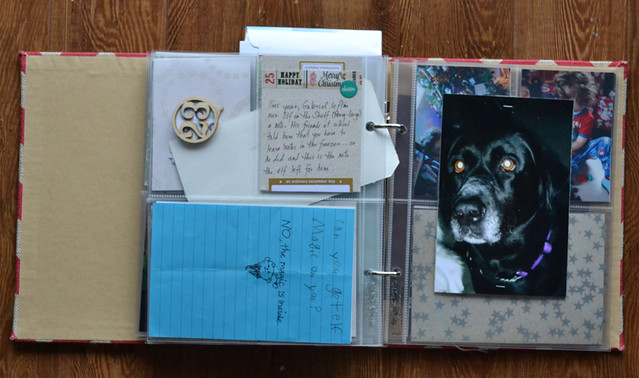
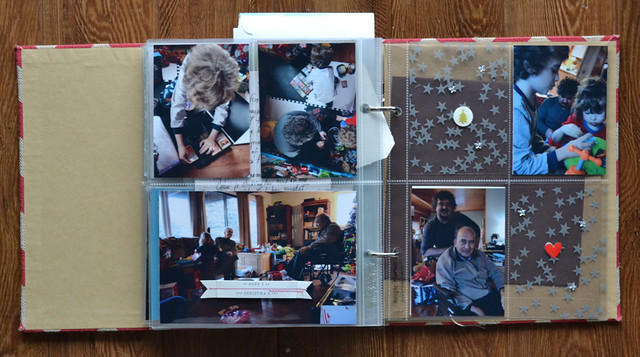
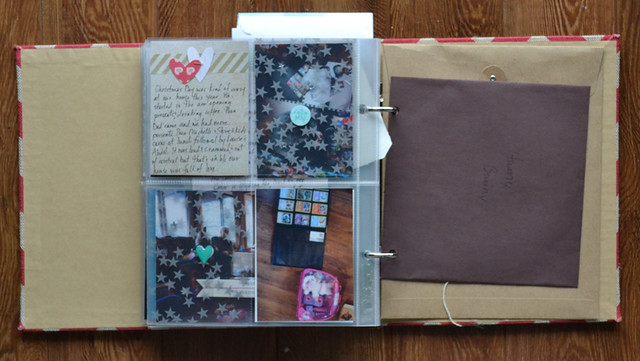
Today, I am sharing the second half of my December Daily album.
The second half of this album is harder to finish - at least for me. It's harder to stay focused and interested and excited.
That's why I like to have a plan. It's the trick to finishing a big project like December Daily. My plan is pretty simple: put pictures in pockets, fill in the gaps with pattern paper, add journaling and embellish.
I just have to stick with the plan.
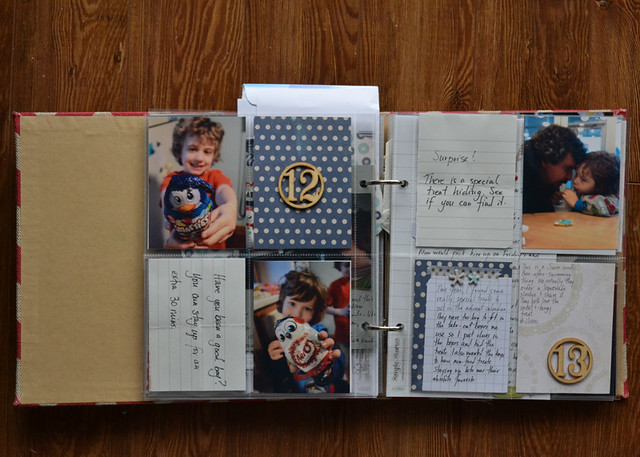
"The Plan" helps me bring stories and ephemera together - like the notes I left in the boys' advent calendars.
I love advent calendars - I loved having them as a kid and I love sharing this tradition with my kids. This year, I tried some new ideas and I wanted to record it. Instead of 25 days of candy, I added notes that let them stay up past bedtime or have extra electronics time. Some treats were extra special - way too big to fit in it the calendar so I hid them. I put clues in the calendar that would help the boys find these special treats.
I knew that I wanted to tell that story so I kept the notes in empty pockets in my December Daily album. I have found that putting things in the empty pocket pages in the album for my project is a great way to store ephemera until I'm ready to use it.
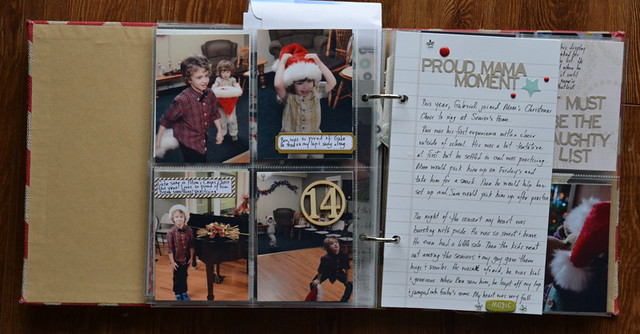
I'm also a big fan of task batching when I'm working on a big project. I find that putting all the photos in pockets at once, writing all the journaling at one time, embellishing all at once - it's easier and faster to focus on one task at a time. It's the only way I can put it all in there and get it finished.
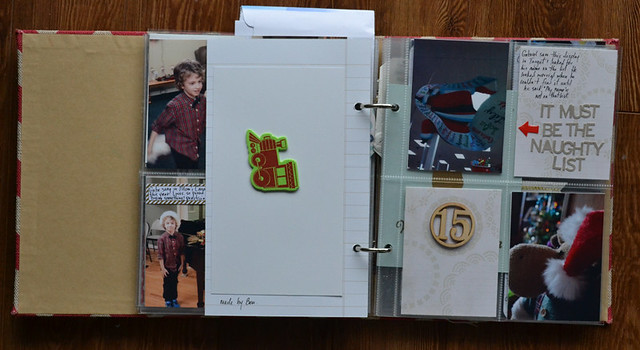
I put in cards that Ben made - like the one with the train.
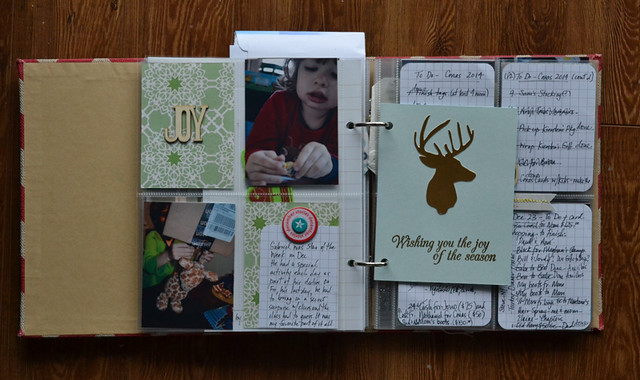
I punch holes in Christmas cards so I can add them to the album.
By the way, the best punch for adding ephemera to albums is the We R Memory Keepers Power Punch. It punches through just about everything. I like the 1/4" but it comes in other sizes.
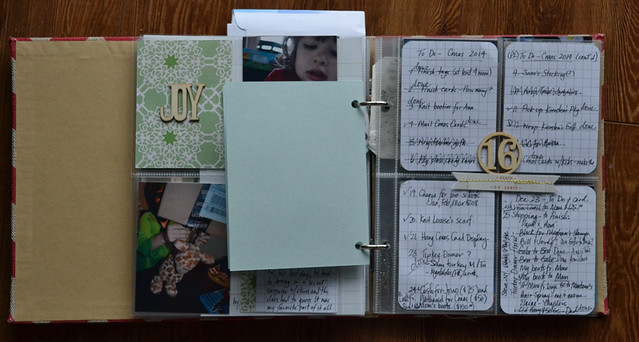
Yep, I put it all in there. On a day when I didn't have pictures or a story to tell, I added To-Do lists.
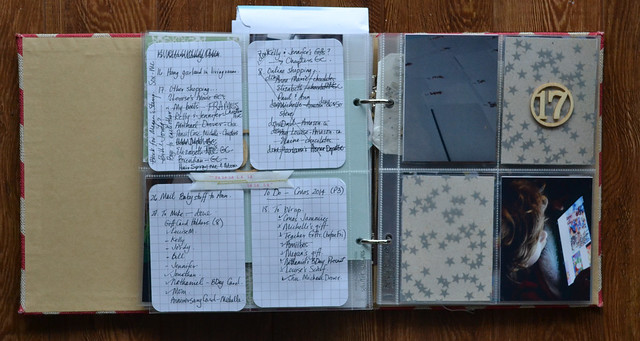
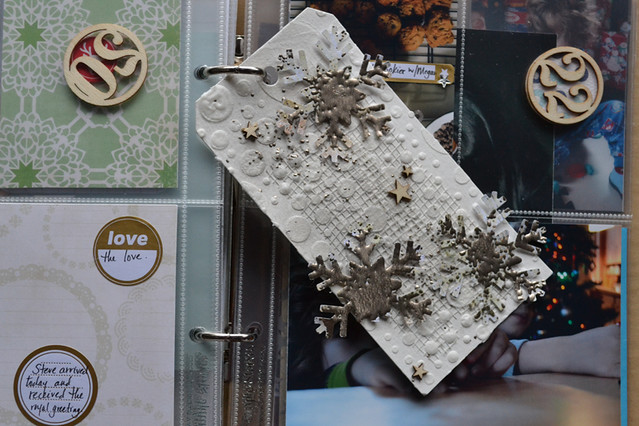
I did manage to get some of my mixed media art into my December Daily. I made this tag for The Paperie's blog and put it in. Just because.
Of course, I had to note that this was our first Christmas without Mac. She's been gone a year now but I still miss her. I will always think of her at Christmas. Years ago, I bought an ornament with her name on it. I still put it on the tree. I think I always will.
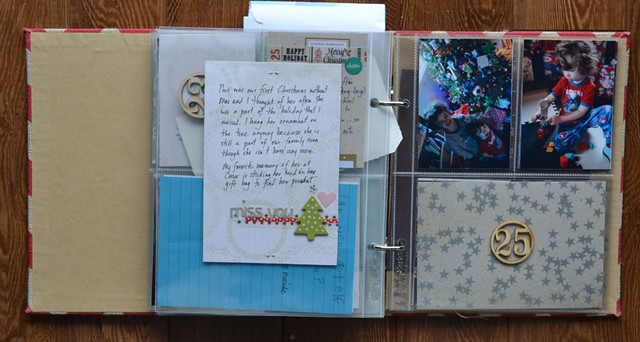
And there it is...done!
I am always telling my scrappy friends how great it is to have December Daily albums and I am always encouraging them to try it. A December Daily album is an amazing thing but you don't have to finish it. Having just the journaling or just the photos to look back on would be amazing. At least, I think so.
Right now, I'm happy to put it away. December will be here soon enough and then I'll be happy to take it out and enjoy it.
Thanks for stopping by!
Cathie
Showing posts with label December Daily. Show all posts
Wednesday, 20 May 2015
Thursday, 3 January 2013
December Daily Highlights - part 2
Hi Friends!
Yesterday I shared some of the highlights from my 2012 December Daily. Today, I'm going to share a few of my very favorite pages before I pack it away with the Christmas decorations.
Here we go...
On December 11, we had an unexpected delivery and one of the boys' presents was left at the door. In the rain. In a puddle. And Gabriel saw it. We quickly convinced him that the parcel was for some one else and that Daddy was going to take it back to the delivery company. Crisis averted!
I had to include this story but I didn't have any pics. I could have just left it with the journaling but I found this perfect page in an old Christmas book. I added a seal from Martha Stewart's collection for Staples and some glittery Thickers to tie it all together. I love this simple solution.
On December 12, I did take 12 pics but I didn't want to put them all in my December Daily. Instead, I chose this picture of Sam reading Ben his letter from Santa. I'm always more excited than the kids when their letters arrive. I love this tradition.
This year, I tucked the letters into the envelope/page.
And, of course, I had to scrap this pic of Mac.
Her face is so expressive in this pic that I didn't add any journaling.
And finally, here's December 21...
I love this page because it's so simple. Just goes to prove that your December Daily doesn't have to be complicated. A date stamp, some Thickers and letter stickers and it's done. I tucked some of this year's shopping lists into the envelope.
And that's my December Daily for another year. I'm glad it's over. I always am but I know I'll do it again next year. I love it.
Some final thoughts...
Thanks for stopping by!
Cathie
Yesterday I shared some of the highlights from my 2012 December Daily. Today, I'm going to share a few of my very favorite pages before I pack it away with the Christmas decorations.
Here we go...
On December 11, we had an unexpected delivery and one of the boys' presents was left at the door. In the rain. In a puddle. And Gabriel saw it. We quickly convinced him that the parcel was for some one else and that Daddy was going to take it back to the delivery company. Crisis averted!
I had to include this story but I didn't have any pics. I could have just left it with the journaling but I found this perfect page in an old Christmas book. I added a seal from Martha Stewart's collection for Staples and some glittery Thickers to tie it all together. I love this simple solution.
On December 12, I did take 12 pics but I didn't want to put them all in my December Daily. Instead, I chose this picture of Sam reading Ben his letter from Santa. I'm always more excited than the kids when their letters arrive. I love this tradition.
This year, I tucked the letters into the envelope/page.
And, of course, I had to scrap this pic of Mac.
Her face is so expressive in this pic that I didn't add any journaling.
And finally, here's December 21...
I love this page because it's so simple. Just goes to prove that your December Daily doesn't have to be complicated. A date stamp, some Thickers and letter stickers and it's done. I tucked some of this year's shopping lists into the envelope.
And that's my December Daily for another year. I'm glad it's over. I always am but I know I'll do it again next year. I love it.
Some final thoughts...
- Photo printing. This year I had some challenges getting photos printed and that was frustrating. I know lots of people use at home printers but I'm not sure that's the solution for me but I can see how it makes things easier.
- Foundation pages. I liked how easy it was to put ephemera into the envelope pages but the paper of the envelopes was too thin for any of the techniques I was hoping to use. I'm not sure I'll use them again next year. We'll see.
- Time. It's an issue every year because Christmas is so so busy. Task batching is a great solution. Maybe it's sticking down photos or jouraling but I do something almost everyday.
- Journaling or daily notes. Another key to getting my December Daily done is notes. If I don't have time for journaling, I will use Post-It notes so I know what goes where.
- Add something new. This helps keeps it fresh and fun. I did like adding the book pages and the photos and stories from my childhood. I know I'll use those elements again next year. And maybe next year, I'll get some of Sam's childhood pics and stories in there too.
Thanks for stopping by!
Cathie
Labels:
December Daily,
memory keeping,
scrapbooking
Wednesday, 2 January 2013
December Daily Highlights - part 1
Hi Friends,
I hope you had a wonderful and magical Christmas. I can't believe we're getting back to our real lives around here. It's almost time to pack it all up for another year. I'm holding out for the weekend - I'm definitely not ready for a de-decorated house. It always feels so bare once the decorations are put away. Part of my de-decorating is finishing up my December Daily. I pack mine away with the decorations each year but before I do I want to share a few of the highlights.
December 4: This is when it started to come together for me this year. It always takes a few pages to get in the groove.
Here's a close up...
December 5 is all about our giant Christmas Bears.
Here's a close up of the journaling and some baby pics. Top right is me with my giant Christmas Bear - the very first of many giant bears. And the bottom left, is Gabriel with his bear, Big Ted.
Here's the right side. I had a series of 3 pics so I made a mini and put it on my page. Kind of a mini-in-a-mini. That's my little helper, Ben. He sticks to me like glue all day long and always want to be a part of what I'm doing (which I totally love).
And here's the mini opened up.
December 8 we put up the tree.
Here's a close up...
And there's another picture of little me. I'm almost Ben's age in that pic. I really enjoyed mixing old and new pictures in my December Daily this year. Definitely something to do again next year.
December 9 was the night of the Great Chocolate Party with my friends. Probably the best party ever! (How could I crop out those adorable baby toes?)
Here's another mini-in-a-mini. It's a great solution when I can't decide what photos to use.
And here's the last page...
I have a few more pages I want to share tomorrow so do come back!
Happy New Year and thanks for stopping by!
Cathie
I hope you had a wonderful and magical Christmas. I can't believe we're getting back to our real lives around here. It's almost time to pack it all up for another year. I'm holding out for the weekend - I'm definitely not ready for a de-decorated house. It always feels so bare once the decorations are put away. Part of my de-decorating is finishing up my December Daily. I pack mine away with the decorations each year but before I do I want to share a few of the highlights.
December 4: This is when it started to come together for me this year. It always takes a few pages to get in the groove.
Here's a close up...
December 5 is all about our giant Christmas Bears.
Here's a close up of the journaling and some baby pics. Top right is me with my giant Christmas Bear - the very first of many giant bears. And the bottom left, is Gabriel with his bear, Big Ted.
Here's the right side. I had a series of 3 pics so I made a mini and put it on my page. Kind of a mini-in-a-mini. That's my little helper, Ben. He sticks to me like glue all day long and always want to be a part of what I'm doing (which I totally love).
And here's the mini opened up.
December 8 we put up the tree.
Here's a close up...
And there's another picture of little me. I'm almost Ben's age in that pic. I really enjoyed mixing old and new pictures in my December Daily this year. Definitely something to do again next year.
December 9 was the night of the Great Chocolate Party with my friends. Probably the best party ever! (How could I crop out those adorable baby toes?)
Here's another mini-in-a-mini. It's a great solution when I can't decide what photos to use.
And here's the last page...
I have a few more pages I want to share tomorrow so do come back!
Happy New Year and thanks for stopping by!
Cathie
Labels:
December Daily,
memory keeping,
scrapbooking
Monday, 17 December 2012
Another Reason to Scrapbook...
On Sunday, I took 77 pictures and I know I am scrapping this one.
Definitely December Daily worthy, don't you think? It makes me laugh out loud every time I see it. I didn't even know she could make that face!
Seriously, I love my old girl.
Definitely December Daily worthy, don't you think? It makes me laugh out loud every time I see it. I didn't even know she could make that face!
Seriously, I love my old girl.
Labels:
December Daily,
dog,
labrador retriever,
memory keeping,
scrapbooking
Friday, 14 December 2012
Mini Twine Wreath Tutorial
I mentioned yesterday that I would share a tutorial for the mini twine wreath I used on the cover of my December Daily.
They're really quick and easy to make. If you're not careful, you'll be swimming in little wreaths in no time!
All you need is twine, green spray mist, shimmer spray mist and a strong liquid adhesive. I used Ranger's Adirondack Color Wash in Meadow for color and Studio Calico Shine for a little hint of shimmer. I also used Ranger's Glossy Accents to hold it all together. It super strong and dries clear!
Let's get started. I wrapped the twine 4 times around my fingers.
Then I took the end of the twine...
...and wrapped it around all the strands of twine. This is important because this is how the wreath is going to keep its shape.
Finally, I tied a knot and trimmed the ends.
Here's what it looks like.
Now it's time for some color! You can use whatever color you want but I wanted mine to look like evergreen boughs so I went with green. I gave it 5-6 spritzes of Meadow mist and then a couple of spritzes of SC Shine.
Then I set it aside to dry.
And while waiting, I tied a twine bow.
When the wreath was dry, I attached the bow with Glossy Accents. (You can dry your wreath with a heat gun to speed up the process. It's smelly but works just fine.)

Yes, it really is that easy. They look great on cards and you can put them on almost anything - tag, present, tree...
I hope you enjoyed this little tutorial and feel inspired to make some mini twine wreaths of your own.
Thanks for stopping by!
Cathie
They're really quick and easy to make. If you're not careful, you'll be swimming in little wreaths in no time!
All you need is twine, green spray mist, shimmer spray mist and a strong liquid adhesive. I used Ranger's Adirondack Color Wash in Meadow for color and Studio Calico Shine for a little hint of shimmer. I also used Ranger's Glossy Accents to hold it all together. It super strong and dries clear!
Let's get started. I wrapped the twine 4 times around my fingers.
Then I took the end of the twine...
...and wrapped it around all the strands of twine. This is important because this is how the wreath is going to keep its shape.
Finally, I tied a knot and trimmed the ends.
Here's what it looks like.
Now it's time for some color! You can use whatever color you want but I wanted mine to look like evergreen boughs so I went with green. I gave it 5-6 spritzes of Meadow mist and then a couple of spritzes of SC Shine.
Then I set it aside to dry.
And while waiting, I tied a twine bow.
When the wreath was dry, I attached the bow with Glossy Accents. (You can dry your wreath with a heat gun to speed up the process. It's smelly but works just fine.)
Yes, it really is that easy. They look great on cards and you can put them on almost anything - tag, present, tree...
I hope you enjoyed this little tutorial and feel inspired to make some mini twine wreaths of your own.
Thanks for stopping by!
Cathie
Labels:
Christmas,
December Daily,
DIY,
mini wreath,
tutorial
Thursday, 13 December 2012
December Daily: Day One
December Daily is my favorite Ali Edwards project. It's a fascinating process of observing and recording the stories (simple and fantastic) that make the Christmas season so special. For more information about December Daily or Ali Edwards, please visit her website.
Hey Friends,
Here's a quick look at the very beginning of my December Daily. I'm not quite up to date with all my pages. For some, I'm waiting on pictures from my printer and others are just notes and ideas.
My plan going forward is to my post pages (in order) as I get them done. I'd love to do this everyday from now until the end of December but if I'm going to be honest, that's a tall order. I'll do my best and we'll see how it goes.
Here's the cover/title page. I love that little twine wreath. I made it myself. (So proud) I've got a little tutorial in the works to share how I made it.
And here's December 1. Advent calendars are my favorite way to start my December Daily.
This is the format for my December Daily so far - journaling on the left and photos on the right. I usually write the journaling and then stamp that little dot border. My journaling blocks get more symmetrical as the month goes on - practice makes perfect and all that! I could have printed journaling blocks but decided to go with the homemade/art journal look that comes with hand stamping.
I adhered the photos directly on the envelope/page and trimmed any excess. There was a little white bit of the envelope showing so I covered it with a bit of washi. Is there any crafty problem washi can't solve? I think not!
So, that's December 1. I promise to post more December Daily updates soon. If you follow me on Twitter (@cathiereed), you'll be the first to know when I do.
Thanks for stopping by!
Cathie
ps: Here is the link to my post about the foundation pages for my album.
Hey Friends,
Here's a quick look at the very beginning of my December Daily. I'm not quite up to date with all my pages. For some, I'm waiting on pictures from my printer and others are just notes and ideas.
My plan going forward is to my post pages (in order) as I get them done. I'd love to do this everyday from now until the end of December but if I'm going to be honest, that's a tall order. I'll do my best and we'll see how it goes.
Here's the cover/title page. I love that little twine wreath. I made it myself. (So proud) I've got a little tutorial in the works to share how I made it.
And here's December 1. Advent calendars are my favorite way to start my December Daily.
This is the format for my December Daily so far - journaling on the left and photos on the right. I usually write the journaling and then stamp that little dot border. My journaling blocks get more symmetrical as the month goes on - practice makes perfect and all that! I could have printed journaling blocks but decided to go with the homemade/art journal look that comes with hand stamping.
I adhered the photos directly on the envelope/page and trimmed any excess. There was a little white bit of the envelope showing so I covered it with a bit of washi. Is there any crafty problem washi can't solve? I think not!
So, that's December 1. I promise to post more December Daily updates soon. If you follow me on Twitter (@cathiereed), you'll be the first to know when I do.
Thanks for stopping by!
Cathie
ps: Here is the link to my post about the foundation pages for my album.
Wednesday, 5 December 2012
December Daily Foundation Pages
So. How's your December Daily coming along?
If you're not doing one, I hope you're enjoying all the inspiration from the Simply Linked list on Ali's blog each day. I grab a coffee and click away.
Anyway, I'm trucking along. I have my foundation pages (which I'll share in a few) and all my journaling is up to date. I don't have my photos printed yet but that's on my "to do" list for tonight. And I have a "plan". For me, up to date journaling is the key to success because I can go back and fill in whatever I need as long as I know where it goes. Right now, the "plan" is just gravy but I like gravy.
So, here are my super duper easy foundation pages. I'm using these envelopes from Staples instead of cardstock.
The last couple of years, my albums have been 6x8. I love that size for any mini album But I decided to follow Ali's lead and change things up this year and try a different size. I also liked the idea of envelopes because I can stuff ephemera in there and it won't get lost or damaged - very handy! I'm hoping to fill them with programs from a Gabriel's first Christmas Concert at school and other stuff he brings home during the month.
So, here's what each spread looks like.
Super plain, right? I know. Probably because I made the whole thing the night of November 30. And I was worried that if it gets too thick it's going to get damaged and fall apart.
Here's a close up of the journaling side.
I masked off an area with 2 Post-It notes and traced the space in pencil. This is where I've been journaling each day. When I'm done, I erase the pencil and start embellishing. And because the journaling is exactly the size of 2 Post-It notes, I'll have no trouble masking it off if I have a messy technique I want to add to the page.
Here's the side for the pictures.
It's very simple layering with some washi tape and a seal from Martha Stewart's line for Staples. I really want to add mixed media techniques and scrapbooking embellishments into this album without too much bulk. The washi tape is covering up some ugly printing on the envelopes and I hope it will reinforce the holes for the rings (once I punch them).
And that's where I started. I know it's not the most exciting piece out there but to me it's full of potential. I can do as much or as little as I want (or have time for).
Thanks for stopping by!
Cathie
If you're not doing one, I hope you're enjoying all the inspiration from the Simply Linked list on Ali's blog each day. I grab a coffee and click away.
Anyway, I'm trucking along. I have my foundation pages (which I'll share in a few) and all my journaling is up to date. I don't have my photos printed yet but that's on my "to do" list for tonight. And I have a "plan". For me, up to date journaling is the key to success because I can go back and fill in whatever I need as long as I know where it goes. Right now, the "plan" is just gravy but I like gravy.
So, here are my super duper easy foundation pages. I'm using these envelopes from Staples instead of cardstock.
The last couple of years, my albums have been 6x8. I love that size for any mini album But I decided to follow Ali's lead and change things up this year and try a different size. I also liked the idea of envelopes because I can stuff ephemera in there and it won't get lost or damaged - very handy! I'm hoping to fill them with programs from a Gabriel's first Christmas Concert at school and other stuff he brings home during the month.
So, here's what each spread looks like.
Super plain, right? I know. Probably because I made the whole thing the night of November 30. And I was worried that if it gets too thick it's going to get damaged and fall apart.
Here's a close up of the journaling side.
I masked off an area with 2 Post-It notes and traced the space in pencil. This is where I've been journaling each day. When I'm done, I erase the pencil and start embellishing. And because the journaling is exactly the size of 2 Post-It notes, I'll have no trouble masking it off if I have a messy technique I want to add to the page.
Here's the side for the pictures.
It's very simple layering with some washi tape and a seal from Martha Stewart's line for Staples. I really want to add mixed media techniques and scrapbooking embellishments into this album without too much bulk. The washi tape is covering up some ugly printing on the envelopes and I hope it will reinforce the holes for the rings (once I punch them).
And that's where I started. I know it's not the most exciting piece out there but to me it's full of potential. I can do as much or as little as I want (or have time for).
Thanks for stopping by!
Cathie
Monday, 3 December 2012
What to do with last year's Christmas supplies?
This is my 4th year participating in Ali Edwards' December Daily project. It's one of my favorite projects and if you haven't tried it yet you really should. It's wonderful. You can read all about it on Ali's blog, here.
Although there were many December Daily kits available this year, I resisted the overwhelming urge to buy one. The size and cost of the kits was a little intimidating and I know that when I finish my December Daily I won't want to use those supplies again. I don't usually make extra layouts because when my December Daily is done, I'm ready to move on.
So, what do I intend to do with the supplies I've been hoarding?
Why make Christmas crafts, of course!
My goal this week is to make my Christmas cards and tags. I have never been so late before but I'm determined to get them made and in the mail on time.
So, I went a-digging through my stash and here's what I have to work with...
That's about 30 sheets of patterned paper...

2 punches, 6 acrylic stamp sets, 2 wooden stamps and 3 sets of chipboard.

I'm not determined to use everything but I want to have some options. Usually I make one card and buy the supplies I need. By using what I have on hand, I'm going to be flexible and expect that there will be variations. The goal is 60 cards.
Next Monday, I'll share the cards I made and introduce next week's crafty project.
Wish me luck!
Cathie
Although there were many December Daily kits available this year, I resisted the overwhelming urge to buy one. The size and cost of the kits was a little intimidating and I know that when I finish my December Daily I won't want to use those supplies again. I don't usually make extra layouts because when my December Daily is done, I'm ready to move on.
So, what do I intend to do with the supplies I've been hoarding?
Why make Christmas crafts, of course!
My goal this week is to make my Christmas cards and tags. I have never been so late before but I'm determined to get them made and in the mail on time.
So, I went a-digging through my stash and here's what I have to work with...
That's about 30 sheets of patterned paper...
2 punches, 6 acrylic stamp sets, 2 wooden stamps and 3 sets of chipboard.
I'm not determined to use everything but I want to have some options. Usually I make one card and buy the supplies I need. By using what I have on hand, I'm going to be flexible and expect that there will be variations. The goal is 60 cards.
Next Monday, I'll share the cards I made and introduce next week's crafty project.
Wish me luck!
Cathie
Labels:
Christmas Crafts,
December Daily
Subscribe to:
Posts (Atom)